Showing posts with label christmas. Show all posts

Friday, December 24, 2010

Merry Christmas & A Happy 2011!


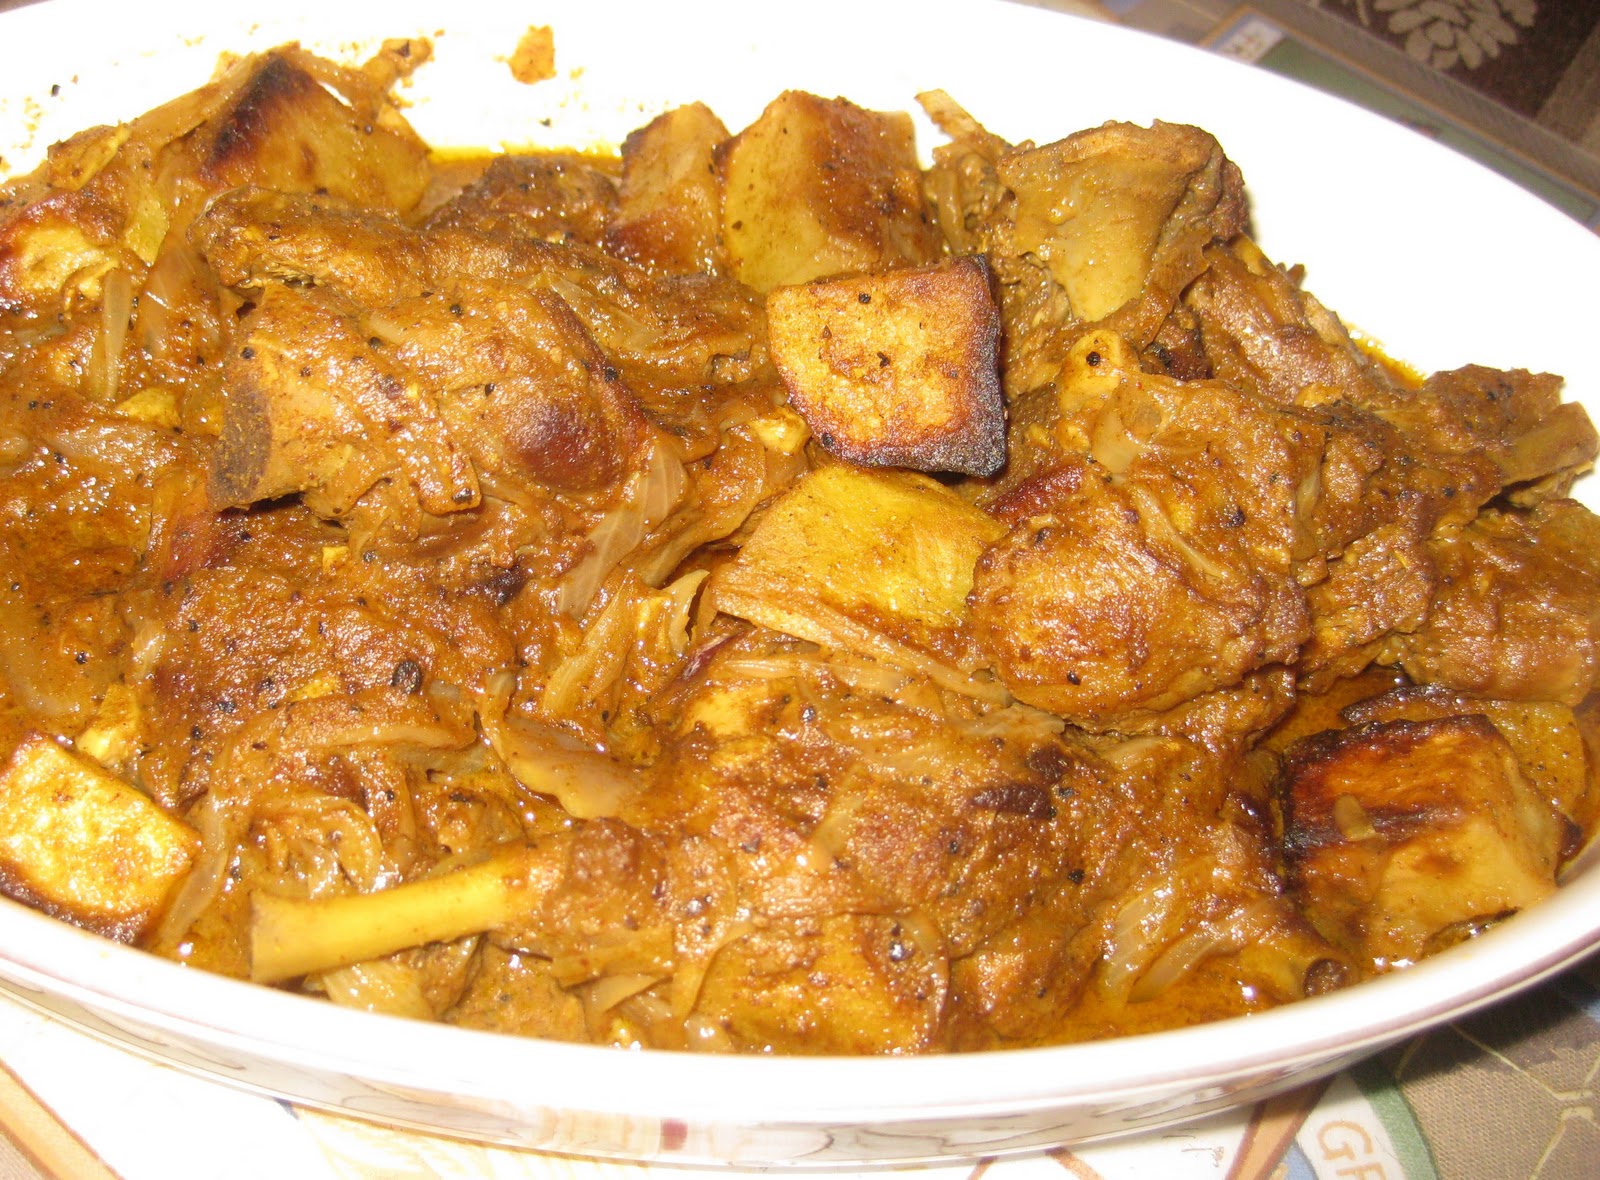
Stars sent lovingly from India have been hung up with lights and all. See one of those above. Just ignore the dark wires:-) Nativity is setup, appam batter is ready, stew pieces are cut and duck roast is done. Fruit cake has been distributed and gifts are under the tree. Now all that is left is for Santa to visit and for us to attend Mass. Did I say that I love holidays especially guilt free ones with no pressure from work? Hope the holidays are going well for everyone and that Christmas is indeed Merry. Wishing everyone a wonderful New Year too . A picture of our roasted duck is below.

Oven Roasted Potatoes
I oven roasted  the potatoes in the oven instead of frying in oil this time. A much better and easier way to do it. Here is how:

Preheat oven to 475F
Just peel and cube 1 or 2 potatoes. You could also cut them into circles as before.
Sprinkle some oil, mix and sprinkle some salt.
Spread on a cookie sheet and bake for 25-28 minutes.
If doing circles reduce the time to 12-15 minutes and check.
Let cool for potatoes to come off the sheet and add to the roasted duck curry. Done!


Saturday, January 30, 2010

Sugar Cookies with Royal Icing


No more baking posts. I promise! This is the laaaaaast.... I had always turned away from cookies in general, especially sugar cookies when presented on the usual platter of snacks. I don't have a sweet tooth. Honestly.  Then why oh why did I go and make these? One word. Kids! Yup, they were day dreaming as well as night dreaming about frosted cookies ever since Christmas came around. Since I haven't done cut-out cookies at all, I wasn't sure what or where to start. With work and some holiday activities going on I simply couldn't get to these until later.

Decided on this recipe from how2heroes mainly because of the video demo for both sugar cookies and royal icing.  Denise's instructions are clear and filled with useful tips. Both kids diligently watched with me and on their own and were a big part in the process. If you remember those superbly made Christmas Cakes from Casino in Cochin with the yummiest icing (yes, even for my non-sweet tooth!)  then you will know why I wanted hard (royal) icing. This one came out fine but nowhere close to that icing/cake combo. Maybe it was the combo of fruitcake/icing that made the taste so great. Wait a minute! I think I will check this out next time I make fruit cake.

I am repeating the recipe here for easy reference. I hope the video will stay forever as that helped the most.

For Sugar Cookies

In The Mix

unsalted butter - 24 tbsp (3 sticks brought to room temp)
ranulated sugar 1 1/3 cup
kosher salt - 2 tsp
egg  yolks - from 3 eggs
pure vanilla extract - 2 tbsp
all purpose flour - 3 3/4 cups (I sift this)
parchment paper or silpat - to line cookie sheets

How To Do

Beat the butter and sugar until the color changes to a lighter shade and fluffy. I used a hand mixer but an electric stand mixer is bothering me in my dreams ever since I saw how much easier it is to use it. But the sheer idleness it will face once the cookie making is over prevents me from getting my hands on one. We'll see how long I can hold off:-)  Add kosher salt and vanilla extract. Beat in the egg yolks one by one. Beat till well combined. Add in the flour in small quantities and beat till fully incorporated. Denise cautions that beating too much will move the cookie texture to that of short bread.

I loved the idea of using plastic wrap to spread the dough. So I made it in two batches as the recipe suggests. Just place the dough b/n two sheets of the wrap and roll away into a consistent thickness. This dough is totally flexible and my inexperienced hands found it to be an easy task. Repeat with the second part. Now keep the sheets in the refrigerator for a minimum of 1 hour. This is to make the cookie cutting easier. The dough will obey the cutter and handling in general better when not too soft. I made the cookies the next day. Need to take it out a good 15 minutes before you start to cut so the dough will yield properly.


Preheat oven to 350F.


Remove the top plastic sheet, use cutters and other tools and have fun making all kinds of shapes like we did!


Line cookies sheets with parchment paper and place cut out cookies with a spatula about 1/2 inches apart. Cook for 12-15 minutes. I swapped the racks as well as turned the sheets around 8 minutes into the baking for even baking as suggested. Take out and cool on a rack before icing.


For Royal Icing
Denise gives a video demo for the icing too.  We didn't prefer the tartness of the icing from the lemon so for the second batch I didn't use lemon but and substituted with water instead. I also added almond extract the second time which came out good too. Used meringue powder (egg white mix) instead of fresh eggs.When she tasted it before the icing hardened, my daughter said it tasted like sweet tart. Once it hardened the tartness blended in and couldn't be detected as overpowering but kids still preferred not adding the lime. I made the icing each time but there was enough left over from the first time and so just making the icing once and using economically might last it for the two sets of cookie dough.

In The Mix
confectioner's sugar - 1 lbs
meringue powder - 1/4 cup (Michael's has it)
water - start with 7 tbsp
vanilla or almond extract - 3 tsp
food coloring
parchment paper - to make piping cones

How To Do

Beat the sugar and meringue powder at low speed first for a minute or two. Add in water and vanilla extract and beat together. Add more water 1 tbsp at a time till the right consistency is achieved. Being able to make a figure of 8 as the video shows and seeing it well before it melts back into the mix is the right indicator. Divide into as many colors you want to do. Add a few drops of the food coloring and combine. Remember to keep aside some as is for white coloring.


We had a few colors and so I made as many cones as I needs with the parchment paper. Fold the paper from one end till it meets diagonally to make a triangle. Cut off the sheet and cut the diagonal. Fold together into a cone with the diagonal side forming the tip of the cone. Taping the cone and standing it in a glass for easy pouring are all wonderful/quite useful tips. Thanks Denise!


Cut off the end if needed and start the artwork. This is the bestest part of the entire thing!!! Total unadulterated fun since elementary school days:-)) Cookies were cut in many imaginable shapes and were colored as it pleased us.


Will I repeat this exercise? But of course! Remember the adage, "It is the  participation that counts"? No, I am not talking about when India comes up with zeroes or close in the Olympic Gold tallies but about  real applicable situations:-) Well, this was one such situation. Once the cookies were done and the colorful icing was prepared and coned even the reluctant Dad jumped into the fray.


I told you we went to town with the icing and shapes. Didn't I?


Frosted cookies were left overnight for the icing to harden and while I won't advice the sweet fest for the health conscious or the slow metabolism crowd, the young citizens were happily devouring one crazy design after another. Enough said!

Monday, December 21, 2009

Cake In A Jar - Bacardi Rum Cake


Merry Christmas, Happy Holidays & A Wonderful Year Ahead Everyone!


This is the last on jar cakes. I promise!

It came about because I also wanted a cake with easier ingredients to make in bulk and guess what turned up in the search? Bacardi Rum Cake! So that was the second cake that went into my jars. This site also has many helpful baking tips. I changed the glaze from the original recipe a little as it was too heavy for us.

Apparently this is a very popular cake and came out in an Ad for Bacardi Rum in the late 1970's. From the reviews it looks like different versions can be made by adding to the recipe or changing the type of the rum used.  But for this classic cake, use only the dark/gold rum. It looks best when made in the classic bundt shape as shown in the ref picture. I didn't add chopped pecans for the jar version. Hope to make the bundt version with the chopped nuts for one of our gatherings provided there is time. It is a good looking cake I think.

In The Mix

pint sized canning jars/lids - 6 (used wide mouthed for this cake)
shortening - 2 tbsp or melted as needed

classic yellow cake mix - 1 box (18.5 oz)
jell-o vanilla cook & serve - 1.5 oz (only used half of the 3 oz. package)
eggs - 4
water - 1/2 cup (did not use the cold milk)
vegetable oil - 1/2 cup
bacardi gold/dark rum - 1/2 cup

for the glaze 
butter - 1/4 cup (4 tbsp)
water - 1/2 cup
sugar - 2/3 cup
fresh orange juice - 1/2 cup (pulp removed)
bacardi gold/dark rum - 1/4 cup

How To Do
Follow steps as before for the jars.
Sterilize by boiling in water for about 15 minutes. Take out only the jars and let dry.
Spread melted shortening to cover all the inside areas making sure to leave the lip clean.
Keep the lids in the warm water till you are ready to put them onto the jars.

Preheat oven to 325C.

Beat together the cake mix, jell-o vanilla, eggs, water, oil and rum on high for 2 minutes. The batter is ready!
Pour batter to a little less than half of the jar. Place on a cookie sheet to balance the jars and keep in the oven. Bake for 45-48 minutes.


While the jars are baking, prepare the glaze.


Melt the butter in a sauce pan. Add water, sugar, orange juice and stir till all the sugar is melted. Boil for 5 minutes while stirring constantly. Remove from heat and add the rum. The rum could cause steam to rush out so be a tad careful here. Let sit while waiting.

Insert a skewer in the center of the jar to see if done. Turn off the oven, but keep the jars inside.


As before, take out the lids and screw tops and keep on a plate. No need for this to dry out.

Take the jars out one at a time from the oven, gently insert a skewer to make deep holes and pour 2-3 tbsp or more of the glaze into each jar. Place the lid onto the jar and screw on with reasonable tightness. Set aside for the jars to self seal. The heat and moisture will help with the sealing process. When the jars are completely cooled, press the center of the lids. If they don't move up or down, they are vacuum sealed. You will most likely hear a gentle popping sound when this happens.  If they move up and down then there is no seal and use as you would a regular cake. Once completely cooled, decorate as you please. See previous post for ideas.


The original glaze when I made it was really rich and we felt the rum content was too much for us. The glaze we used was lighter and more pleasing to us. I think the gentlemen in the family will prefer this cake and the ladies will prefer the one in the previous post. I plan to make a yellow cake mix from scratch when I try to tackle this another time. The cake apparently stores well whether sealed or not. But for the jar version, it is safer to make sure that they are sealed.

When you are ready to eat, open the lids and slide out the cake and cut into circles or just spoon out of the jars or make long cuts using a knife and slide out the pieces to enjoy!


Here is the lowdown on jar cakes compiled from the many sites and from trying out:

* buy 1 pint sized jars. these can be wide mouthed or not. the wide mouthed ones are easier to slide out of but the other looks better.

* only use shortening to grease the jars prior to baking

* any quick bread type of recipe (recipes with baking powder)  can be baked in the shortest time and the baking time is similar to that of the actual recipe.

* a regular cake recipe will take longer with the jar baking time about 15 min less than the actual baking time.

*quick bread types can be filled up to half or slightly more of the jar as they will not rise out of the jar too much at that level.

* regular cake recipes should be filled less than half of the jar to avoid overflow

* even if the cake overflows, it can be pushed back into the jar while closing the lid but this is not much fun to do.

* for each recipe you try, it is good to make one jar at first to get an idea of the amount of batter needed and the baking time.

* they are all time great gifts with a home made touch for friends, family, teachers, work.. you name it.

* it may sound like a lot to do but once you make the jars in a cake  a first time, it will not feel so and there is no parallel to it for a personalized gift

Sunday, December 20, 2009

Cake In A Jar - Yogurt And Brown Sugar Cake from Cannelle et Vanille


The Manger is up and lighted.

So is the tree with the ornaments.

Even the ginger bread house is made and devoured!

The dangling roof lights from last year were never taken out and so turning those on was easy as usual:-) Hey, you do what you can to make life easier.

Now it is time to bake some gifts and goodies, mainly the cake.  Unfortunately having a crazy time at work with projects moving at the speed of light does not conduce to relaxed planning at home for the holidays. Instead you develop brain fatigue at the prospect of working through the holidays leading to inertia and apathy. OK it is not that bad only pretty close. Luckily squeals of laughter from the little ones jumping in joy at the thought of the upcoming holidays (already here) and of getting gifts from Santa and everyone else can just perk you up. Why the activities can even help to relax and restart the overworked brain! Since the fruits were not bought they didn't get macerated and the fruit cake simply cannot be made this year. That is when I remembered the cakes in a jar that we had sent out as gifts to family in the early years of our marriage. They were apparently a success unless the recipients were being polite out of love:-).

Those were the early years of food blogging. Google had not made its appearance, yet the truly initiated were already making their mark on the net. When my search for Christmas gifts yielded these pages (I am so glad I was able to find them intact again now, years later!) I was energized. Had a hard time finding the canning jars (also called mason jars) then but now I see them everywhere. In grocery stores as well as in Target. I made brownies and banana nut bread then but wanted to try something different and more Christmassy this time.

Yogurt And Brown Sugar Sponge Cake from cannelle et vanille


When one of my colleagues came back from a trip to France, we were all given the delightful French Macarons. Now, they are not the thick heavy macaroons  that we are used to but melt in your mouth angelic textured pieces of sheer delight!  cannelle et vanille was brought to my attention by the colleague as a good site for homemade french macarons with detailed instructions. The recipe index at the home page makes it very easy to navigate. The pictures are so awesome that I couldn't take my eyes off of the site for the longest time. I hope I will get to make those macarons some day (I hear Starbucks sells some in their stores) but didn't want to try this for the Christmas baking. The name of this recipe is what caught me and the 'yogurt and brown sugar cake' sans the ice cream  from there is what I made as it sounded yummy and doable. I just had to get muscavado sugar from amazon. Other than that I had all the ingredients. So made them in the jars and they were delicious and light as hoped.

In The Mix
pint sized canning jars/lids - 5 (used narrow mouthed for this cake)
shortening - 2 tbsp or as needed
check here for gram conversion

butter  - 170 grams/11.942 tbsp ( keep at room temp for some time before making the batter)
brown sugar - 150 grams/10.537 tbsp (to soften this, keep covered with a wet paper towel for a while)
granulated white sugar - 85 grams/5.971 tbsp
muscavado sugar - 50 grams / 3.512 tbsp
vanilla extract - 1 tsp
eggs - 2
yogurt - 180 grams/12.645 tbsp
all purpose flour - 180 grams/12.645 tbsp
baking powder - 4 grams/0.843 tsp
zest from 1 lemon

How To Do

Sterilize the jars and lids by boiling in water for about 15 minutes.
Take out the jars and let dry.


Spread melted shortening to cover the insides making sure to keep the lip clean.
Keep the lids in the warm water till you are ready to put them onto the jars.


 Preheat oven to 350C.

Beat the butter, brown sugar, white sugar and muscavado sugar together for about 2 minutes. If you find that the muscavado sugar does not completely get broken, this is just fine and even desired. Makes for a crunchy bite in the cake as the site suggests.  Add lemon zest and vanilla extract and mix well together. Add the eggs one at a time and then add the yogurt. Time to add the flour and baking powder. Both can be sifted together for a good mix.


Checkout my new digital scale. I had bought this for my HMom before she left last year and meant to get one for myself based on all the awesome reviews. Got it at last and it is all that and more. Love it.


Pour the batter to a little over half of the jars. Place on a cookie sheet to balance the jars and keep in the oven. Bake for 20-25 minutes. Insert a skewer in the center to see if done. Turn off the oven, but keep the jars inside.


Now that the jars are ready, take out the lids and screw tops and keep on a plate. No need for this to dry out. Take the jars out one at a time from the oven, place the lid onto the jar and screw on with reasonable tightness. Set aside for the jars to self seal. The heat and moisture will help with the sealing process. When the jars are completely cooled, press the center of the lids. If they don't move up or down, they are vacuum sealed. You will most likely hear a gentle popping sound when this happens.  If the lid moves up and down, then there is no seal and just use as you would a regular cake. The sealed cakes are perfect for mailing and have been known to keep fresh and moist for up to 6 months when stored in a cool, dark place. They never last this long anyway so I have not experienced the longevity personally. Can vouch for 3-4 weeks for sure.


Once cooled, decorate to your heart's content. You can make little notes and thread on a ribbon tied to the jar. Little pieces of fabric cut as 10" squares or circles will add to the festive look. This time we printed out little index cards and punched holes on them to thread. We had greetings from the 4 of us as well as a link to the original recipe site and the name of the cake on it. Lovingly homemade yet with a nice professional touch I'd say. If that is too much, just put a little circular festive label on the top with the cake's name handwritten on it. We tasted some ourselves a few days later and the cake stayed as fresh and moist as the day it was made!

For these type of narrow jars, use a knife to slice inside and slide out the pieces.


Saturday, December 13, 2008

It's That Time of The Year Again! Fruitcake ( from Spicyana)

I had never liked fruitcakes much and this didn't change when I tasted the fruit loaded brick of a fruitcake here too. But you can never underestimate the power of memories. The tangy taste of the fruitcakes I had with the little goblet of wine at wedding receptions apparently stayed with me. The whole memory was reawakened and became a forceful nostalgic quest for more when one of my friend's Mom made it here on a US visit and gave me a quite generous portion to take home. By the time the quest became insufferable – my logical mind could not believe that I actually wanted to make and eat this cake – her Mom had already gone back. So in a moment of courage – I am a follow the instructions on the cake mix box and make a pound cake once in a while girl - I set out on my always fruitful food blog searches for a recipe. After going through many excellent recipes, decided to try spicyana's fruitcake. I had always been fascinated by all those baked cakes.
I stayed true to the recipe with due exceptions made for what I could find and what I assumed. The Indian store I went to for shajeera said it is the same as kala jeera and so that is what I used. I made the caramel a little early in the day and it kinda hardened by the time it was to be added and I heated it up in the microwave to liquefy again. This did not seem to have affected the taste much. It was quite a success and by the time a week came around the cake was barely there! Every time I took the cake out for basting with Rum it went back in a little less:-)
The recipe is pretty much the same as at spicyana's. For some reason, I am not able to link to the single recipe but to a whole page which contains it and you will need to scroll down a bit to Dec 13 to find the recipe. I am reproducing it here with how I went about it so it is easier for me the next time. This is the second year I made it and intend to make it a regular feature of our X-mas activities. Family and friends who have tasted it love it and I myself have heavily fallen for it. Must be all that rum:-)
Dry Fruits
golden raisins - ¾ cup
black raisins - ¾ cup
dried apricots – 12 chopped
dried tart cherries - ¼ cup
orange juice (no pulp) – 1 cup
nutmeg powder – ¼ tsp
cloves – 3
honey – 2 tsp
rum – 4 tbsp (I used Bacardi Select original premium crafted rum. I am sure any rum is fine but being completely lost in that aisle, wanted to note what I finally picked)
grated orange rind – 2 tsp
Warm the orange juice, add all the dried fruits and the other ingredients together and keep for 2-3 days in an air tight container.
Caramel
sugar – 1 cup
water – 5 tbsp
butter - ½ tsp
Take 1 cup sugar in a pan and add 1 tbsp water to it. Heat till you see a color change and stir continuously from this point. Keep on stirring till all the sugar melts into a nice golden brown. Add butter and stir. Add the remaining water. Take care to add the water very slowly so it won't splash up onto you. The solution will bubble up and all that but don't worry and keep on stirring and remove from heat to cool. Try to make the cake before the caramel hardens, but if it does, then carefully microwave it or melt again.
In The Cake Mix
all purpose flour – 2 ¾ cup
baking powder – 2 tsp
confectioner's sugar – 1 cup
butter – 1 cup
eggs – 5
cinnamon – a pinch
ground kala jeera (shajeera?) - ¾ tsp
vanilla essence – 1 tsp
soaked fruits and caramel from above
Did not use 1/4 cup chopped flour coated cashew nuts as we don't prefer it in the cakes but add if you do.
How To Do
Preheat oven to 300F.
This will make two round shallow pans of cake.
Grease the cake pans with butter or shortening. I do this by keeping the pan with the butter in the oven while heating up, then taking it out and spreading the melted butter around. Did not use parchment paper and did not flour the pans. Just lazy!
Sift the flour with baking powder and all the spice powders.
Melt the butter and add sugar. Beat with an electric hand mixer for a minute.
Beat the eggs and add to the butter-sugar mix. Add vanilla essence and caramel. Beat for 4 minutes.
Add the prepared flour now little by little and mix well with a whisk.
Add soaked fruits and whisk it in or stir in with a spoon.
Pour into pans and place it in the preheated oven for 60 minutes.
Since these pans are shallow, they don't need more than 60 minutes, but a deeper pan needed about 1 hr and 15 minutes.
Cake is done when a fork inserted in the center comes out clean.
Cool for 15 minutes and unmold.
Bast with rum all around and cover in foil.
Repeat rum basting once a day for as many days as you are patient up to a week.
Not sure how long it will keep as every time it gets over within a week. I have mailed them across the US and reports indicate they were in perfect shape to be enjoyed on reception.
I can't believe I am making these cakes with gusto and would like to thank spicyana's winner of a recipe for making it possible.