Showing posts with label chicken. Show all posts

Tuesday, January 19, 2021

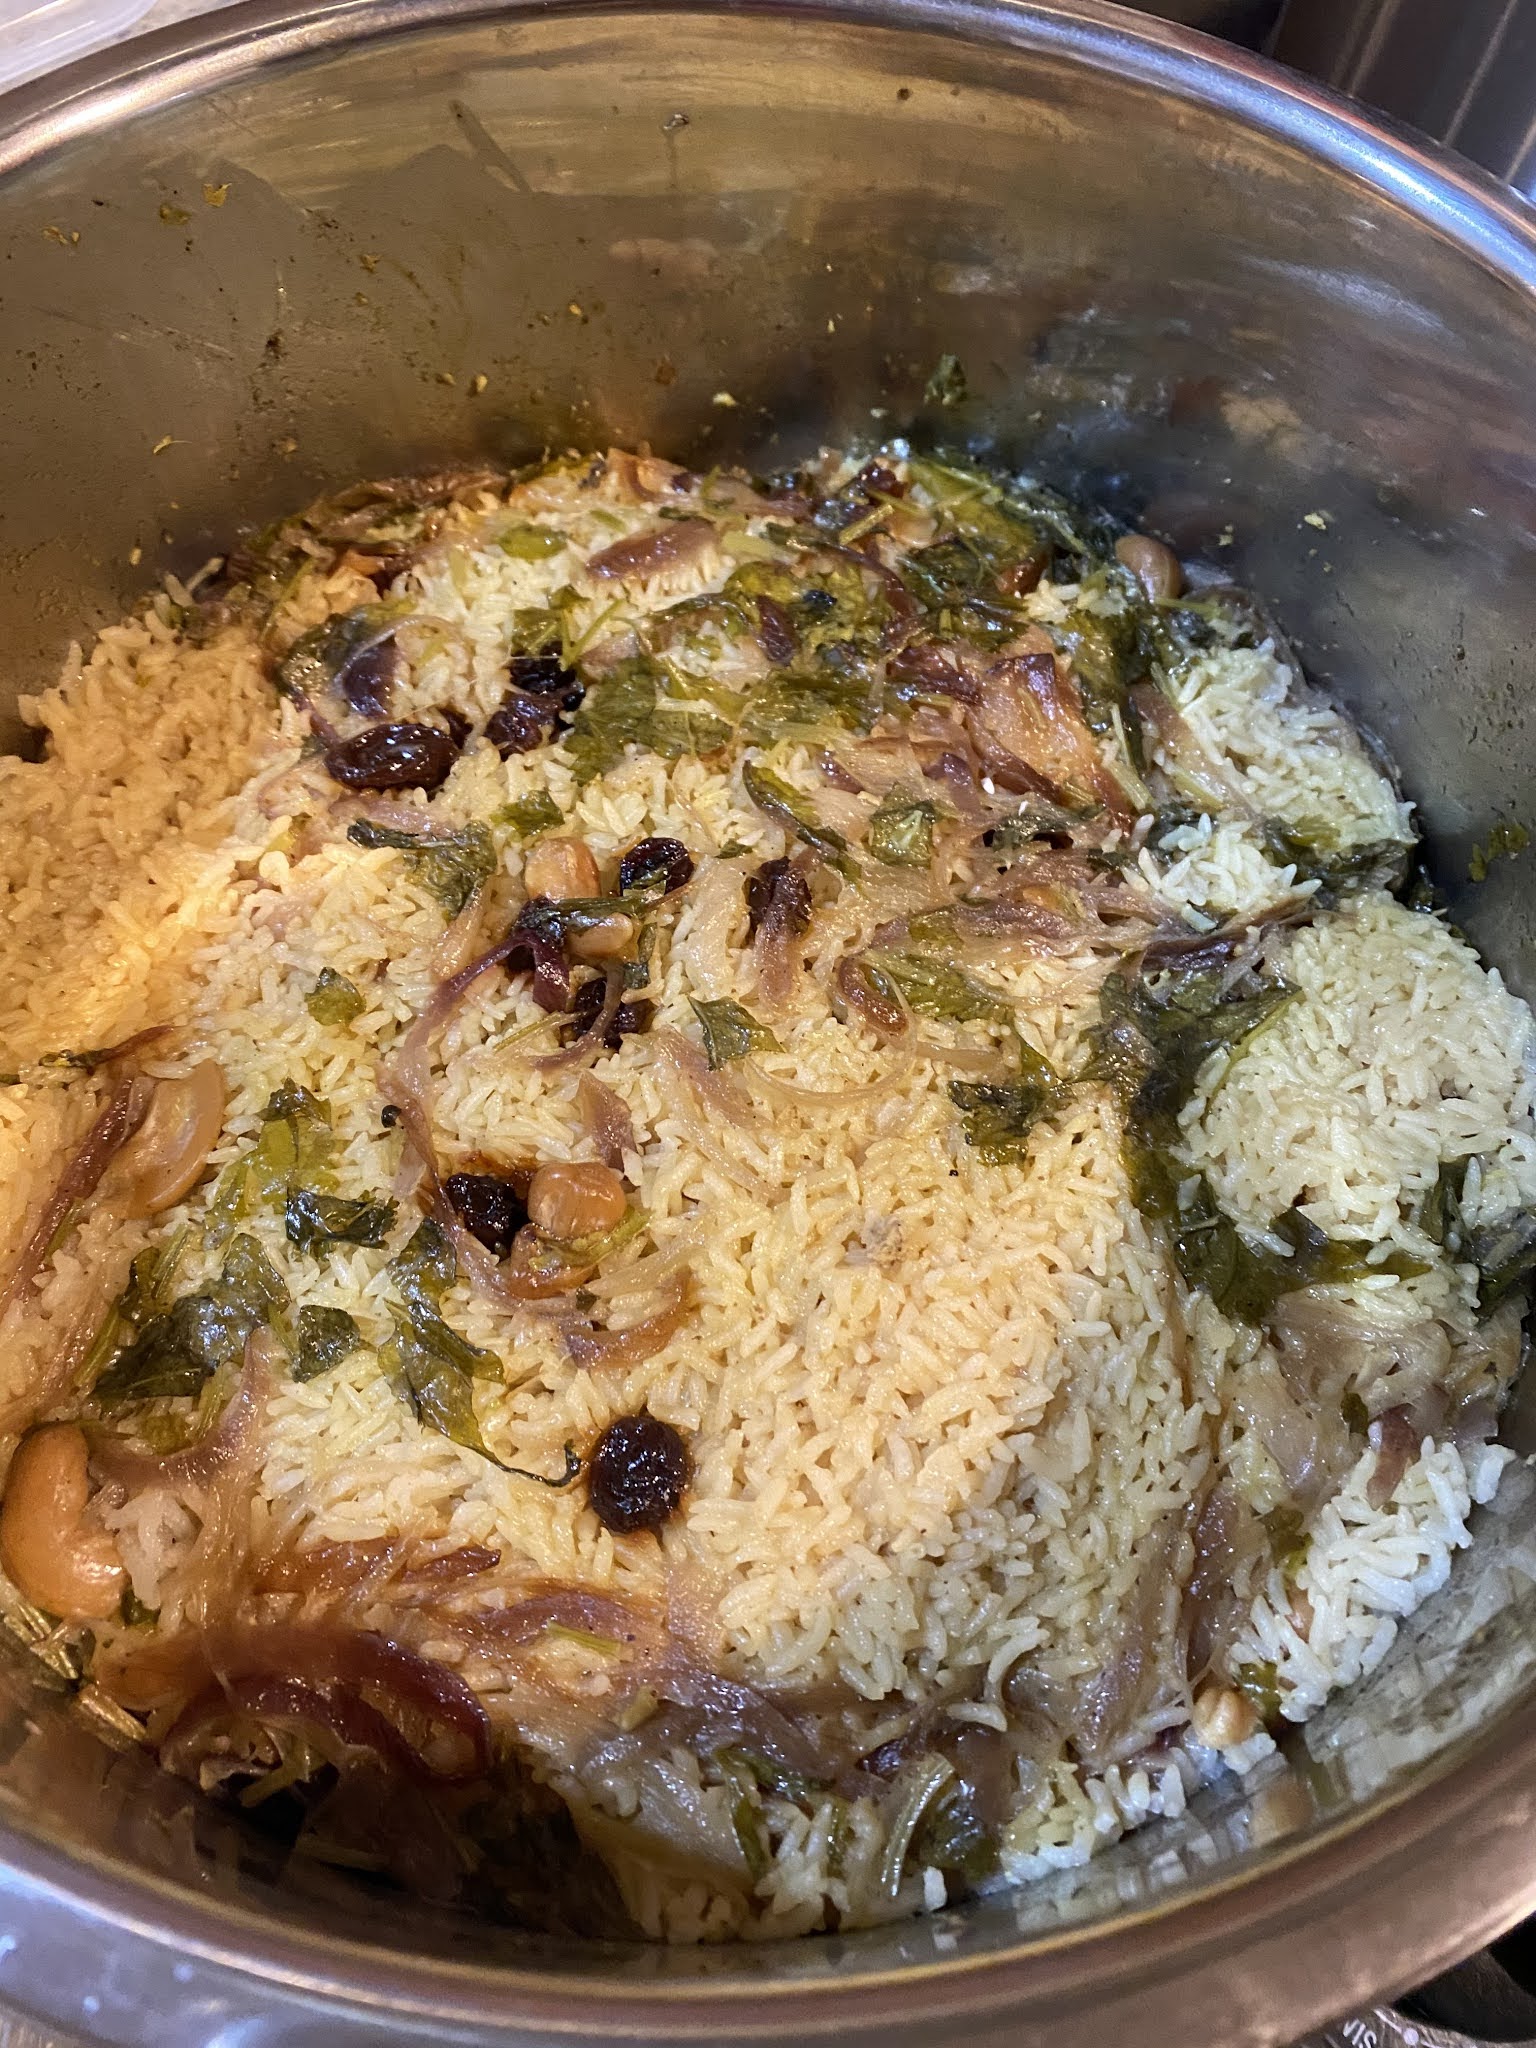
Instapot : Malabar Chicken Biriyani


How many biriyani's can one make at home anyways? My answer to this remained the same up until the pandemic. There is only one and it had to be with lamb if it is to be home made. Then COVID-19 happened and the four of us gathered back under one roof again with no outside options for food until we discovered Doordash. Enter instapot and along with it the versatile biriyani which after all is the best known single dish Indian meal. We need raita and papad but they are accompaniments.  A single dish meal along with a single pan to wash is a real incentive. So I started cooking various items to see what works best with the instapot. The 3qt pot I had didn't yield any leftovers to justify all the prep work. So I got an 8qt to check it out. In retrospect a 6qt would've been fine but I was done trying. Now the 8qt is the appliance of choice for biryanis while the 3 qt is dependable for anything else. 

Most instapot adapted  biriyanis I tried came out good but the one that worked out the best in terms of customer satisfaction and flavor profile is this particular version. Especially for chicken lovers. The base recipe is from malluspice whose recipes are all top notch especially with their authentic malabar flavors. Made some tweaks to use it with instapot and air fryer and for general personal convenience so I can go back to it easily when we feel like it is homemade biriyani time. 

For more flavorful lamb, one might depend on the lamb biriyani recipe from before and adapt for instapot. I'll make a post once I try it out with the ipot. One thing to note is that I don't use ghee anymore because the kids don't like it. Olive oil is always king here when it comes to cooking oil.

In the Mix

basmati rice - 3 cups (250 ml cup)
water - 3 cups

chicken - 2 1/2 lbs (use a mix of drumsticks, boneless chicken breast and thigh) 
                               up to 4 lbs could work with this recipe as I have found.

onions - 5 (1 for raita, 2 1/2 for cooking and 1 1/2 for seasoning)
olive oil - 2 tbsp or enough to coat the onions

cashew nuts - 1/4 cup
raisins - 1/4 cup
cinnamon stick - 2" piece
olive oil - 2 tbsp
garam masala - 1 tbsp or as needed

poppy seeds : 1 1/2 tsp
fennel seeds : 1 1/2 tsp
-use a coffee grinder and make in into a paste by adding some water after

 B
green serrano chili - 100grams
ginger - 50 grams
garlic - 50 grams
-measure with a kitchen scale and chop all together in a chopper

C
cloves - 4
cardamom - 4
bay leaf - 1
- gently crush all together

D
pepper powder - 1 tsp or to taste
turmeric powder  - 1/2 tsp or as needed
biryani masala - 2 tsp or as needed (sub with garam masala)

E
yogurt - 1/2 cup
lemon juice - 2 tsp 
salt - to taste

F
cilantro - 1 1/2 cups chopped (1 cup for cooking and 1/2 for seasoning)
mint - 1 cup chopped
curry leaves - a few sprigs


How To Do

The most time consuming item for me when making biriyani is the onion. So I want to get this out of the way as early as possible. Once I decide on biriyani, I set out to make onions, along with marinating the chicken. If marinating chicken overnight, then make onions also the day before to save time.

Thinly slice all the onions. Use one to make raita and keep refrigerated.
Preheat the air fryer to 390.
Sprinkle oil and salt and gently squeeze the onions together to mix well.
Spread onions in the air fryer basket and do 12 minutes, with a stir at 6 minutes
Remove about 2 1/2 worth of onions for cooking.
Heat the remaining onions for 2-3 more minutes until golden brown for seasoning
Keep all onions refrigerated if you are making the biriyani the next day.

The above steps can be done in the traditional wok and frying in oil or in a regular oven at 425 for 20 min on each side. But I like the air fryer the best.

Cut chicken into large pieces, wash and drain. Depending on how much chicken you have, you can tweak the spices slightly in all steps to match to your taste.

Mix chicken with items from A,B,C,D and set to marinate overnight in the fridge or at least for two hours outside. Do not add E items including salt, if marinating overnight.

Take chicken out about one hour before cooking and add items from E, mix well together and set aside. Take the fried onions out too if done the day before.

Wash and soak the rice in water for 30 minutes, drain and set aside. This is also a good time to check with H to see if you can delegate papad making to him.

Set the instapot to 'saute' and heat 2 tbsp of olive oil.
Add the raisins and heat until they start to puff up and add the cashews. 2-3 minute all together should be good. Use a slotted spoon and set aside along with the golden fried onions for seasoning

Add more oil if needed and add the 2" cinnamon stick. Mix in the onions for cooking and add the marinated chicken. Saute for 5-6 minutes.

Add 1/4 cup water to the chicken bowl to mix with remaining marinade  and add into the chicken at this time. Sprinkle in 1 tbsp or more of garam masala, add all the leaves from F for cooking and mix well. Remember to set aside 1/2 cup of cilantro from this for seasoning needs.

Do check to make sure the pot is still on 'saute' setting.

Check salt and add as needed at this step.  Might want to add a little more than needed to account for the addition of rice. It is good to see if you can reduce the water and make the gravy thicker at this step as that gives the chicken pieces a better color. I normally don't wait for this since the overall flavor is still great. With a wooden spoon and gentle stirring, make sure the bottom of the instapot bowl is deglazed and clean to avoid any BURN warnings later on.

Layer the drained rice onto the top of the chicken mix. Sprinkle in some seasoning (mostly golden onions and some cashews, raisins, cilantro) in between the layers and on top. Do NOT mix. 

Add remaining 2 1/2 cups of water along the sides first and then at the center. Again take care to not mix anything. Check salt and add as needed by mixing only at the top layer.

Close the lid, pressure cook on high for 7 minutes and natural release for 10 minutes. Then open the seal valve and vent the pressure. 


Saturday, May 2, 2020

Teriyaki Chicken with Rice & Spinach #coronatime #campuscravings


My son's been missing some aspects of campus life ever since he came home and online schooling started. One day while we were talking, something reminded him of this teriyaki chicken bowl he used to eat at one of the many eateries close to the campus. Seeing how easy it was to make it, I gladly signed on. It was good that we had some chicken and spinach conveniently on hand. With long lines at grocery stores and lack of enough delivery slots at Amazon for WholeFoods, every food decision had to be made with some thought into the availability of ingredients. Turns out this is an easy to make dish where even the home made teriyaki sauce is easy to do!  Checked quite a few sauce recipes and finally settled on this one from cookingclassy  Made some spinach and basmati rice to go with it was a winner in the household. This wholesome meal is definitely here to stay!

In the Mix

boneless chicken breast - 1.5 lbs (chicken thighs are apparently more authentic)
olive oil - 1 tbsp
green onions - optional (I didn't have any)

For Homemade Teriyaki Sauce
soy sauce - 1/4 cup
water - 1/4 cup
honey - 2 tbsp
brown sugar - 1 1/2 tbsp
sesame oil - 1/4 tsp
garlic - 2 cloves minced
ginger - 2 tsp minced
rice vinegar - 1 tbsp
corn starch - 2 tsp

How To Do

Cooking rice ahead of time helps to serve everything hot once chicken and spinach are ready to go.

Wash, drain and cut the chicken into 1" cubes and set aside. Dry with paper towels

Mix the corn starch with rice vinegar in a small bowl and combine with no lumps. Transfer this and the rest of the teriyaki sauce ingredients into a large bowl. Whisk all together and set aside.


Heat oil in medium high heat and add the diced chicken. Cook on one side for about 3 minutes and flip over.


I turned each one over religiously. After about one minute into the second side, pour the prepared sauce over the chicken. Let cook for about 30 seconds before stirring. Cook to a total of 3-4 minutes on the scond side or until the sauce thickens to your liking.


Serve with spinach or any vegetable mix over rice and enjoy! My daughter likes spinach and so it worked out great for both kiddos. Below is a quick note on how to make this particular spinach.

Spinach (3 lbs. washed and drained) - 2 minute recipe
Saute' 3-4 cloves of crushed garlic in 1-2 tbsp of olive oil on medium high heat in a bowl large enough to hold all the spinach.
Add spinach and mix well together. Cover and cook for 1 minute.
Open, mix well again, cover and cook for another minute.
Add salt at the end, remove and serve hot after draining excess water.

Tuesday, February 18, 2020

Chicken Biriyani Instapot Edition

Like the air-fryer, instapot is another invention of the decade that has impacted how my kitchen activities evolved. Biriyani while highly palatable, had always evoked the image of a labor intensive dish in my food prep plans and so it never made it into a regular menu item. That is, until Mr. Instapot took a foothold on the crowded kitchen counter.

It was an uninspiring Monday of a lazy  3-day weekend and I was walking around musing on dinner ideas for the coming week. Too lazy to go to the grocery store and equally lazy to wash dishes. That is when the idea that has struck many a harried mother the world over occurred to me too. Make something with whatever is in the kitchen. Being an engineer by profession, I'd say laying out and executing a project plan is way easier than coming up with a dish plan on a whim. Not a natural cook by any means, I found that food videos and blogs inspire the latent cook in me. So watching and reading is what I did.

I had chicken legs at home and rice and the instapot too. I liked Vahchef's idea of a flavorful chicken biriyani in a cooker and myheartbeet's instapot steps were well laid out and precise. Decided to combine both with a bit of overlap in flavors and steps and voi-la born the biriyani that hitherto will be a constant go to product, er dish in my humble kitchen.

In the Mix


chicken legs - 6 

basmati rice - 2 cups
water - 2 cups
mint leaves - 1/2 cup chopped
cilantro leaves - 1/2 cup chopped

ghee - 1tbsp
olive oil - 3 tbsp

for garnish
cashewnuts - optional
raisins
2 shallots

addon -1
cloves - 4
cardamoms - 3
black pepper corns - 1 tsp
garlic - 5 pods

ginger - 3/4" thin piece


addon -2
kalajeera - 1 tsp (or shahjeera)
cinnamon stick - 1/2 crushed
bay leaf -2
biryani masala - 1 heaped tbsp
salt to taste


addon-3
green chillies - 5 sliced
shallots - 6 sliced thin

addon-4
garam masala - 1 heaped tsp
turmeric - 1/4 tsp
paprika/kashmiri chili -2 to 3 tsp


How To Do

Soak the rice for 20-30 minutes, drain and set aside.
Halve each of the chicken legs, wash and set aside.

In a pestle, crush all items from addon-1 in that order. Cloves, cardamom, pepper, ginger, garlic.
Transfer to a bowl, add the meat pieces along with all items from addon-2.
Kalajeera, cinnamon stick, bayleaf, biriyani masala and mix well. Add salt to taste and set aside for 30 minutes.

Turn on the saute function of the instapot, add 1 tbsp of ghee and 2 tbsp of olive oil. Fry the raisins until they swell up, then the cashew nuts and set aside. Saute 2 sliced shallots for 4-5 minutes and set aside all for garnishing later.

Add the remaining 1 tbsp of olive oil to the instapot pan and add the shallots and green chili from addon-3. Add salt as needed and saute for 6-7 minutes. Check and make sure to select the saute default timer does not get turned off.

Now add the meat mix and saute well on both sides. 6-7 minutes. 
Add items from addon-4 garam, masala, paprika, turmeric and mix well together for 2-3 minutes. Make sure to scrape the bottom of the pot so the BURNT won't show up later on. Deglaze with bit of water if needed. Check salt.

Spread rice on top. Add water. Do not mix together. Sprinkle mint and cilantro leaves on top. Close the lid and pressure cook on high for 7 minutes. Pressure release at normal for 10-12 minutes and release any remaining pressure manually. 

Garnish with raisins/cashews and onions, remove to a serving dish and enjoy unashamedly with papads and raita.

Unfortunately picture taking couldn't be done before the dish did its disappearing act. So that will have to wait until it gets made again which can't be that far off going by the glowing reviews.

Friday, June 2, 2017

Broiled Chicken Drumsticks


As I said, it is oven, oven all the way here. Drumsticks play an important role in this scenario. Magic words of clean, fast and easy came true in this excellent recipe adapted from simplyrecipes. Thank you simplyrecipes for making this a staple for us.

I did have a yummy recipe for chicken legs but the oil step was making it a messy proposition to clean up after. So it is that this nifty recipe came to save our lives. Really, to help me not to do the cleaning.

In The Mix

chicken legs/drumsticks - 12

For the Marinade
green onion stalks - 10 , white & green parts, diced
serrano chilies - 3, seeded, quartered
garlic cloves - 3, peeled, crushed
lemon thyme - 1 tbsp, chopped
cilantro - 1 tbsp, chopped
white wine vinegar - 2 tbsp
garam Masala powder - 1 1/2 tsp
freshly ground pepper - 1 tsp
kosher salt - 1 1/2 tsp

kosher salt - to sprinkle
pepper powder - to sprinkle
olive oil - to coat the broiler pan

How To Do

Turn the oven broiler to high/450F.  Make sure to place a rack at the center of the oven before it heats up. Wash and drain the drumsticks and pat dry with paper towels. Set aside.


Mix all of the marinade ingredients and  grind to a paste. Immersion blender does this job well.

Marinate the chicken legs with the paste for 30 minutes at room temp. If you set it to marinate overnight in the fridge, make sure to take out and keep at room temp for 30 minutes prior to baking.

Boiler pan is best as it can take the heat of the broiler. Other pans may warp. Coat the bottom pan with some oil with a sprayer or paper towels. Cover the top slit pan with aluminum foil for easy clean later. Coat the foil also with oil. Make sure to open some slits of the top sheet for juice to run into the bottom pan.

Arrange the drumsticks on the pan and sprinkle generously with kosher salt. Add pepper as needed. Broil for 10 minutes, turn the pan and turn over chicken pieces and bake for another 10 minutes or till the juices run clear when poked with a knife.

Enjoy with hot sticky basmati rice & yogurt or with fresh baked bread.


Tuesday, April 22, 2014

Easter Ruminations


Not really ruminations but isn't that a wistful title? I knew that would get your attention and I was right eh? :-) My Hcousin sent me this catchy picture of eggs they decorated in the most innovative way. Loved it and had to put it up. Hope she will not be unhappy that I have it here. She used natural leaves and natural food colors like turmeric following some suggestions from the net. She is a very creative kid. Now, how did we celebrate Easter? Like all good christians we invited some friends over, cooked a nice spread that included ribs, appam, stew, biriyani, raita and semiya payasam in that order. What? Did we go to church? Oh yes. We somehow managed to find some time to fit that in even though we were very busy with all these other activities, you know:-) At least this time we managed! This most important part gets pushed back a lot of the times if we are inviting people over since it is precious cooking time...  No food pictures could be taken as we barely managed to finish things before the guests arrived. End Result : Happy guests and happy hosts.

Work is getting busier and busier as usual with projects mingled with some heavy politics and I was really happy to take this time out to relax. 'Cos if Relax won't come to me I go to Relax:-) Ok I could be a little too relaxed because kids are off all this week and so there is no last minute race against time to cover the measly 5 minutes between home and school. 

In case you haven't noticed, the biriyani recipe link in the first paragraph is not from cheenachatti. It is from a blog that I admire much. Malabar Spices was closed for a while and I was happy to find it open again. Every single recipe I have tried from there has come out well. The flavors are always great and so was this malabar chicken biriyani . Thanks malluspice! I am reproducing it here with slight changes so I won't lose it again. Hope malluspice will approve.


In The Mix
chicken - 5 lbs (I got drumsticks, thighs and breast packages to make up the chicken since we love more meat in the biriyani)

onion – 6 medium sized
tomato - 3 medium sized 

fennel seeds - 2 tsp
poppy seeds  - 2 tsp
grated coconut - 1 tsp
cashew nuts - 4 to 5
small hot green chilies – 25 diced once
ginger - 4 inch piece peeled and diced
garlic pods – 15 large cloves peeled and diced
pepper Powder – 2 tsp
turmeric Powder - 1 tsp

plain yogurt- 1 cup
lemon juice-  juice of 1 lemon (not lime)
salt - as needed

mint leaves - 1 cup chopped
cilantro leaves - 1 cup chopped
curry leaves- a handful

garam masala- 5 heaped tsp. I add a lot of this as we like how it adds richness to the meat 

clarified butter (ghee) -  1/2 cup 
coconut oil - 1/2 cup
cashew nuts – as needed
raisins-  as needed

for the rice:
basmati rice - 4 1/2 cups
cinnamon - 1 stick of 3 inch
cloves  - 4 
cardamom  - 4 
bay leaf - 1
lemon juice- juice of 1/2 lemon
coconut oil - 1 1/2 tbsp
salt to taste

garam masala:
I didn't have the recipe ingredients. So I turned to my trusty garam masala mix as always.
Take equal parts of cardamom powder, cloves powder and cinnamon powders and mix together. Add 1/4 tsp of nutmeg powder if you have it. My HMom sends these in freshly powdered packs and I appreciate the taste it adds to all my curries.

How To Do

Clean the chicken and cut into medium sized pieces. Wash and drain well. 

Soak the fennel seeds and poppy seeds in a bowl with water for an hour at least. 

Dice the tomatoes and slice the onions. One onion should be sliced extra fine. This one is for the garnish.

Add grated coconut and cashew nuts to the soaked seeds and grind it with an immersion blender for a few minutes. Add the ginger, garlic and green chilies to this and grind all to a very coarse paste.
Marinate the chicken with the ground mixture, pepper powder, turmeric, yogurt, lemon juice and salt.

If you have to marinate overnight, omit the salt, lemon juice and yogurt and add that 1 hour before cooking. This is a very important tip from malluspice. Seems to keep chicken tender and in the right texture when heated up.

Heat 1/2 the ghee in a heavy bottomed pan. Add the garnish portion of the sliced onions and fry, till they turn golden brown and crisp. Add a sprinkling of sugar to speed up the process. This should take about 10 minutes on medium low heat. This was the least fun part I think. Remove the onions and stir fry the cashew nuts on medium heat till it turns brown on all sides. Drain and remove. Add the raisins now and stir till they plump up. Remove all  garnish onto paper towels and set aside.

Heat up the remaining  ghee and half the oil and saute the rest of the sliced onions till it becomes translucent. Add the diced tomatoes and saute till tomato almost blends in. Add the rest of the marinade and the biryani masala and the coriander, mint and curry leaves and mix thoroughly.

Take a flat bottomed pan and heat the remaining oil. Add just the marinated chicken, and gently fry it on all sides for 3-4 minutes on high heat.  Lift out of the oil and add this to the sautéed mix and combine well. Cook uncovered on medium high heat for 6-8 minutes.  Then keep it covered and cook on low heat for about 20 minutes. Add water only if there is no liquid for the chicken to cook.  Check frequently to prevent burning and wait till the oil starts to separate. There should be some gravy left and the chicken should be almost cooked, not-coming-apart cooked. Check taste and add more salt or lime, pepper etc as needed.

 Preheat the oven to 300 degrees Fahrenheit. 

 Clean and soak rice for 10 minutes. Keep aside. Heat 1 1/2 tbsp of oil and add the whole spices- cinnamon, cardamom, cloves and bay leaves. Sauté for a second and add the drained rice. Stir fry the rice till it turns opaque and add 6 cups water. When the water-rice mix comes to a boil, cover and cook on slow heat till all the water is absorbed. This would take about 6-8 minutes. Add salt to taste and mix gently. 

In an oven proof dish, spread half of the chicken masala and place half of rice over it. Sprinkle some lemon juice to prevent the rice from sticking. Spread the remaining masala and top it with rice followed by lemon juice. 

Close it with a layer of aluminum foil , crimp it along the sides and put it in the oven for 20 -25 minutes. Cooking time can be less than this if chicken or rice got cooked more than intended. Remove and let rest for another 5-10 minutes before opening. 

Since kids don't like the onion,nuts, raisin garnish I add/sprinkle them while serving.

Serve with Raita and Papadam. I thought I had posted a raita recipe earlier but I cannot find it. Will be posting one soon. H makes a mean one and everyone loves it. The biriyani came out so well that I couldn't stop eating it!

Wednesday, July 24, 2013

Chicken Noodle Soup!


I know this is not the most popular summer recipe but I assure you that you will be rummaging for this on those cold winter nights. Especially if you and family are feeling a bit under the weather and just want some comfort food. I am posting this now as comfort food for reflections. A bowl full of CNS goodness and I know she will  feel like adding a new post on her wonderful blog:-)

One of the things I like about my kids' school is the hot lunch feature. It beats having to scramble for lunch in the mornings. They don't love every offering there but I'd heard them speak of the chicken noodle soup many a times. So I asked the lunch lady for the recipe and she was happy to oblige. I am writing down her recipe here mostly as is.

I updated this recipe in 2017 to reflect what I do now since the kid tastebuds are thirsting for flavor instead of the pristine clean soup they used to insist on.

In the Mix

chicken thighs - 5 or 6 (with skin on, washed & drained)
water - 1 quart (4 cups)
chicken broth - 3 quarts , low sodium(12 cups)
better-n-bouillon - 10-12 tsp (I used chicken flavor)
poultry seasoning - 1/2 tsp or to taste (now that kids are older I buy a dried blend of onions, thyme, rosemary, garlic etc and add a generous portion)

baby carrots - 1-2 cups
baby green beans - 1 1/2 cups (fresh or frozen)
celery sticks - 3-4 stalks, quartered
green onions - 2-3 stalks, quartered
shallots - 2-3, peeled and halved
cilantro - a small bunch , quartered

medium wide egg noodles - 1 pk of 12 oz. (340 gms)

How To Do

Boil water and chicken thighs covered in a pan for about 20 minutes. Let it boil once before covering to cook. Remove the chicken pieces and set to cool. Save the pan with the cooked broth for the next step. Once chicken is cooled, remove skin and bones and shred to bite-size pieces.

Add chicken broth to the cooked juices in the pan and simmer. I tried switching some of it with vegetable broth but the little sleuths found me out and would not touch the resulting soup however yummy it is!

Now add 'better-n-bouillon' to simmering water to make broth taste very rich with flavor in the short time. I am sure regular bouillon blocks will do just fine if 'bnb' is not available. Add poultry seasoning and stir. Here you can go to town by adding your own flavors as little or as much as you want. Mix all well together. Time to add the shredded chicken and all other ingredients. Veggies can be of any kind so long as they are strong enough to withstand the cooking. The trick is not to get them too mushy. Bring all to a boil. 

Add the egg noodles now. Cook on low to medium heat for about 8-10 minutes and the soup is ready to roll. I mean to roll onto your tongues and tummies:-) Wait for the warm comforting feeling to emerge and envelope you in a cozy sense of well being as you sit and enjoy your soup.. 


Friday, August 17, 2012

Chettinad Chicken from Kaipunyam


Kaipunyam is a well organized, to-the-point cooking blog with incredible food pictures and a good sprinkle of love. Something about this blog begs you to go back there all the time. It is a single point stop  for any Kerala recipes you might be thinking of. I had bought some chicken this week and wanted to try something different. Went to kaipunyam and with close to 40 recipes just for chicken it was easy to pick one right away! The recipe there is mostly as shown in the post. I made it with small changes for convenience and quantity and less salt and chili as we do now and it turned out well. Thanks 'kaipunyam' for the recipe and the easy to follow format!

In The Mix
chicken - 1 lbs
fennel seeds (perum jeerakam) - 1 tsp ( i am not a fan of this..)
turmeric powder - 1/2 tsp
shallots - 6 to 8 sliced (add more if u like it, i do!)
dry red chili - 10 to 15 split into halves
coriander(cilantro) leaves - few sprigs
curry leaves - few sprigs
tomatoes - 4-5 diced
water
oil - 1/2 tbsp
salt to taste

How To Do
Cut chicken into pieces, wash, drain and marinate with salt and turmeric.
I always do this part overnight but this time could only do about an hour and it still tuned out good!
Heat oil in a pan and saute fennel seeds, dry red chilies and curry leaves. Add shallots to
it and saute till golden brown. Add tomatoes, stir and cook for a while. Now add the chicken, salt and enough water to keep things moving around. Saute the chicken for a few minutes, cover and cook. Remove from fire and add chopped cilantro before serving. I think plenty of curry leaves, dry red chili and shallots are the secrets of this recipe. Very tasty results with a small effort!
 

Saturday, April 2, 2011

Fajitas Anyone?


First things first. I am glad India won the World Cup. Truth be told I didn't know about the whole thing until a Srilankan colleague sent a mail offering congratulations. "Congratulations on what?" I asked and he brought out the whole World Cup Cricket enchilada including the semifinals that India had won. Now the snippets of conversations I'd heard around the house and among other Indians began to fall into place! It's been so long but I used to be much interested in Cricket results when Sunil Gavaskar and Kapil Dev ruled the roost.  I even used to sing "one day cricket to the blues" because it sounded like a good replacement for this. Sure I'd heard of the then up and coming Tendulkar and so it gave me a jolt when I read that this will be his last game. And what a fitting end! Anyway just for old times sake  I had told the colleague that we will cream his team and now I can be at work on Monday with a well placed smirk:-) Just kidding, of course he cares more about just watching a good game than who wins and was saying that the Indian team is really good this year and will most likely win. So Congratulations Indian Team! Now let us come back to the subject at hand. Our fajitas.


When the mouse does not go to the mountain, the mountain goes to the mouse! This is what got me to making chicken fajitas. My boy is a picky eater. I have to say his ultimate choices are somewhat healthy so I should not complain. It just makes life a little difficult when none of the existing choices seem to pass muster! Chicken fajitas sounded like something the kids might take to and so I found a few recipes. This recipe was picked based on reviews and I made some changes as always for our needs. The recipe called for a packaged fajita mix which I couldn't find in any stores and so I found another recipe online to make it from scratch. All in all the end result turned out very good and all of us have bought into fajita nights! My girl has not taken to fajitas as much but being a happy little soul she joins in with eating whatever she can from it. The recipe is good for chicken or beef but I have only tried chicken so far which is pretty good already!!


In The Mix


chicken breast - 1 1/2 lbs ( boneless/skinless. breast meat is the secret behind tender & juicy result)

red bell pepper - 1 sliced (julienned if you have time)
green bell pepper - 1 sliced
yellow bell pepper - 1 sliced. i added this for color
yellow sweet onion - 1 sliced
olive oil - 2 tbsp 

flour tortillas - as many as needed (10)  

toppings
sour cream or yogurt - 1 cup
diced tomato - 1
salsa - optional ( i buy this fresh and love it)
avocado - optional
cut lettuce - 2 cups 

for the marinade
mc cormick fajita seasoning mix - 5 tsp ( since there was a recall on it none were available and so i used a recipe give below for this mix)
olive oil - 1/8 cup
vinegar - 2 tbsp
lime juice - 1 tbsp
mc cormicks spicy roasted garlic chicken seasoning - 1 1/2 tsp
(i found this seasoning at the store. i think you can use salted garlic powder mixed with crushed chili powder if you don't have this available. didn't use the peppers and since fajita seasoning mix had oregano, i added it there instead of here.)


fajita seasoning mix
cumin powder - 1 1/2 tsp
oregano - 1 tsp
salt - 1/4 tsp
salted garlic powder - 1/4 tsp
chili powder - 1 tsp or more
pepper powder - 1/2 tsp or more
didn't have onion powder. so used 2 shallots sliced circular which is a keeper for this.


How To Do

Preheat oven to 350. Cover the tortillas in aluminum foil and heat for 10 minutes. Turn oven off and keep tortillas in until needed.

Mix all the fajita seasoning ingredients and spoon out what is needed for the marinade. Add the sliced shallots to the marinade. Wash and drain the chicken. Make sure it is sliced into fajita sized pieces. Slice or butterfly to get the desired size. Mix all the marinade ingredients together with the meat. Check salt and sourness to taste and marinate overnight. 


Take grill pan and heat very well so the meat won't stick to the bottom when you add it. You can grill outside if you are up for it. The grill pan works perfectly fine except it can smoke up the house if you need to use it for a second round. Do about 3-4 minutes at the most on each side, remove from heat and drain on paper towels. Mmmm. Yummmm. You will have little boys flying around in anticipation with all that yummy smell. 


Once cooled, slice the chicken into smaller pieces and they are ready to be served. Now on to other accompaniments.


To make the peppers, heat oil in a pan and saute the onions on medium heat. Cook until wilted and add the peppers. Mix well and continue to cook till peppers are wilted and onions are crisp and lightly brown. 


Put all the toppings in separate bowls and get out the warm soft tortillas. Take one tortilla, spread with peppers, chicken, yogurt, salsa or other toppings of your choice. Roll on both sides and dig in!! Be forewarned that you might need a napkin or two to keep the juices from getting away and to keep things clean..


Monday, August 23, 2010

Pan Seared Chicken Legs


I know I know. It's been a while and I have nothing but the same old excuse to put forward. But hey, to make things a little fun let me talk about something new. At least it created a lot of excitement in our little household. I am talking about the 'Next Food Network Star' from Food Networks. I had watched Season 1 long time back and then this season 6 is the next one I got to watch. Good timing since the final Star ended up being a cook with Indian background.  Liked all the finalists but was extra glad to see Aarti win. Missed her first episode this last Sunday but won't be missing anymore since it is being recorded. I am looking forward to her American recipes with Indian flavor in the hopes of getting the kiddos back on track with homemade food. Little tummies are being monopolized by burgers, pizza, cold sandwiches and the likes lately. Keeping to this spirit I tried out a chicken recipe that was on the Food Network site by Cheryl Smith with a mild Indian update and it worked wonders and earned 4 fans right away!

I hope it is OK with Food n/w and Cheryl Smith for me to write it up here.

In The Mix

chicken drumsticks with skin on - 6 (recipe calls for chicken breasts. tried both & prefer drumsticks)
olive oil - 3 tbsp (to be used in halves)
kosher salt - to taste
freshly ground black pepper - enough to cover the pieces well
herbs - enough to sprinkle on (had no fresh herbs. dried rosemary and thyme worked well and dried basil and parsley equally good)
garam masala - 1/2 tbsp (from 1:1:1 mix of cardamom:cloves:cinnammon powders)
garlic cloves - 8-10 peeled and crushed


How To Do

Preheat oven to 400F.

Wash and drain the drumsticks well. If using chicken breasts, I found cutting into large pieces resulted in yummier fare. Cover the pieces with half of the oil. Make deep scores in the meat if needed. Now season each piece with a good amount of pepper and salt. This is very crucial. Don't be shy with the salt and pepper. Add in the garam masala too at this time.

Heat oil in a pan and add the pieces one by one with skin side down. Sprinkle on the herbs and add garlic to the oil.


Cook over medium high heat. When the skin gets golden brown, turn over and repeat for a minute or 2. Now spread the pieces on a baking pan and bake for about 15 minutes or as needed. Remove from oven, drain on paper towels and get ready to eat the tenderest juiciest chicken ever. Perfect with yogurt and rice/vermicelly pulau. What makes it even easier is to do the frying part in an oven ready pan. Then we can just push the whole thing into the oven right after the frying step and baking time gets down to 8-10 minutes. Just great!


Sunday, November 8, 2009

Roasted Chicken Legs - from Mishmash


Mishmash's is another blog I appreciate for its presentation and nostalgic write ups. So when I had some chicken legs and wasn't sure what to do, I decided to try this out from there. It turned out well and I have made it many times since then. The pics are from one of those time. I was waiting to take a better picture but looks like this is as far as my clicking abilities can go with night light. Not that it is any better with day light but the excuse sounds good. Right? It is all Nancy's fault really as she thinks I am not cooking!! Kidding aside she keeps this blog going at times when I find it difficult to come back to it.

I am adding the recipe here for future reference. (My kids might want to make it?) I hope so. It is mostly verbatim from Mishmash.

In The Mix

chicken legs/drumsticks - 14-16 or as many as that comes in a pack. (multiply or divide from
mishsmash's ingredients based on quantity) medium cut chicken
breast pieces also come out very well and are more suited for
our everyday cooking needs.

for the marinade
chili powder - 2 1/2 tbsp (the kids like it less hot)
turmeric powder - 1/2 tsp
garam masala - 3 tsp ( I use the homemade version from my Hmom. an easy version
is equal amounts of cardamom, cinnamon, clove powders)
freshly ground black pepper - 1 1/2 tsp
ginger - 2" piece
garlic - 8 to 10 cloves
lemon juice - 5 tsp fresh squeezed
salt to taste

to fry
curry leaves - 2-3 sprigs or as many as you want
olive oil - enough for half the height of the pieces to be submerged depending
on the size and shape of the pieces and the pan.

to saute

big red onion - 3 -4, thinly sliced
green chilies - 6-7, sliced once or twice at an angle
curry leaves - 2 sprigs
leftover marinade from the chicken. (neat idea!)
salt to taste


How To Do
Wash the chicken well and score it once or twice for the marinade to get inside. I don't pat dry anymore and like the resulting extra marinade. Crush and finely chop the ginger and garlic. I stopped using the pastes as I never had a good experience with the store bought version and I am not one to make that at home. The crushed chopped version seems to substitute very well. Marinate chicken overnight with the marinade ingredients as above.


Heat oil in a pan and fry curry leaves till crispy. Set aside. Place chicken pieces in oil and fry each side 2-3 minutes or until done on low to medium heat. Drumsticks will appear fried with shorter time but the insides might have red which simply isn't yum. Keep the leftover marinade for the next step.

Remove the fried chicken and drain on paper towels. We start the tasting process at this stage:-)) Remove some of the excess oil and add onion, chili and saute well. Add the marinade and curry leaves and saute till all blends well and appears cohesive. Remember to wash the marinade dish with a little warm water to increase the amount of marinade to add.

Now add the chicken pieces and mix everything together gently so as not to break the pieces. I also add the fried curry leaves at this time. Make sure chicken pieces are covered in the masala, cover and cook for a few minutes so all the flavors join together.

Serve alone or with the temporarily crowned King:-) More on the King er.. Queen later. Thanks Mishmash for this surefire recipe.


Friday, October 10, 2008

Fried Chicken - From Vanitha


Vanitha Magazine has this series where they write up on small local restaurants made famous through word of mouth. I find that I am becoming a fan of the one recipe that they usually give out from one of the popular items. So far everything I have tried have come out well. This is no exception.

The smell of the marinade is appetizing even before you start cooking. So I don't have to elaborate much on the aftermath. Guys and gals, get out your pans and aprons and get ready for a short and rewarding cooking experience.

In The Mix

Boned Chicken - 2 lbs (cut into medium pieces)
lemon drops - squeezed from 1/2 a lemon
salt to taste
oil - 1 cup or as needed

to crush
crushed red chili - 1 1/2 tbsp
turmeric powder - 1/2 tsp
cumin powder - 2 tsp
ginger - 2" piece (cut into 2 or 3 pieces)
garlic - 10 lean cloves

How To Do

Crush the 'to crush' items by adding one at a time to the mix. Add salt and lemon drops to this and mix well.


Marinate the chicken in the mix for 1/2 to 1 hour.


Heat oil and fry/cook the chicken on both sides. Drain on paper towels and enjoy as is or with rice and veggies. It is as easy as it sounds and yummy to boot. Want to try? Go for it!

Sunday, October 5, 2008

Three-In-One


I don't have a recipe today. Wanted to post about something which probably is well known among the initiated. This is best done when making fried chicken curry. I had almost forgotten the way my Mom used to do this and how I used to just wait for it. Well, the picture says it all. How to get three items with the labor of one!

Make sure some cooked rice is on hand.

Start making your favorite chicken curry. On its way to the finish line, stop right before where you reduce the gravy so it forms a thick coat. Scoop some up into a bowl with enough light gravy so it can accompany appam, porotta or chapathi. Item 1 is ready:-)

Now reduce the gravy to your end and Item 2 is ready as intended. Remove to serving dish.

But wait! Don't wash of the wok/pan/cheenachatti that you used to make the dish. I hope you left some small chicken crumbs and stuff in the pan. Bring out the rice and add to the pan. Mix all together with some salt and your instant fried rice and thus Item 3 is ready!

Enjoy the fried rice with yogurt, papad and if you must, the chicken dish you prepared.

Enjoy the earlier gravied dish another day with suitable accompaniments.

My Grandmother and I were opponents when the rice was prepared in this manner. No one else I guess even knew this was available since the two of us saw to it immediately! Then of course we won't be 'that hungry' for the subsequent lunch or dinner:-) Mom always did this in a special cheenachatti made of bronze that shone like gold on the inside and like onyx on the outside. Another household favorite here.

Monday, September 29, 2008

Chicken Vindaloo


Not long after I got married, my Hmom lovingly sent us a cookbook and a bunch of handwritten notes with her own recipes. Little did she know the impoverished nature of my relationship with the kitchen then! I used the cookbook in addition to my KMM's book but didn't dare go near the handwritten recipes as they were written by an expert for an expert. It is only recently that I have come to believe that I could try out stuff from it to good results.

Vindaloo is not a favorite of me or my husband but he loves it when it is done in pork. Since I am not a fan of that particular meat, I had long wanted to try the recipe with chicken instead. This is exactly what I did this weekend and it came out very well if my husband the vindaloo connoisseur is to be believed. I made a discovery alongside the process and it is that this vindaloo could be the meat version of 'meen pattichathu'. Also the resulting dish tastes a hundred times better if you realize it to be meat pickle akin to shrimp pickle. Do try it and let me know if this is true or not. That is, if you happen to catch a vindaloo bug while reading this:-)

In The Mix

chicken - 2 lbs cut into medium to small pieces ( boneless chicken is best for this recipe)
water - as needed (not more than 1 cup)
vinegar - 8 to 10 tbsp depending on yout tolerance to its taste
sugar - 1 tsp (decrease or increase sugar content based on resulting taste)

to grind
red chili powder - 4 tbsp
kashmiri chili powder - 2 tbsp
dry red chili powder - 1 tsp
turmeric powder - 3/4 tsp
cumin powder - 1 tsp
ginger - 1" piece
garlic - 6to7 small to medium cloves
mustard - 1 tbsp
salt - to taste


to season
mustard - 1/4 tsp
shallot - 1/2sliced
curry leaves - 1 sprig or less
oil - 1 tbsp

How To Do


Grind all the 'to grind' ingredients together in a blender with 2-3 tbsp of vinegar and some water.

Heat oil, break mustard and add sliced shallots and curry leaves and saute for a while. Add the ground mixture and saute well till the mix is roasted. Now add the remaining vinegar, sugar, salt if needed to the mix and add the chicken pieces. Mix well together and cover and cook in low heat. Should not take more than 15 minutes.

Dilute with water if needed or add more vinegar for personal taste. If there is more liquid, heat on high to reduce as this is better to taste with minimal gravy. Enjoy with rice and vegetables. Since this is rather new to me I have not yet perfected this recipe but have noted here all the adjustments I made while making this as reference.

Saturday, July 26, 2008

Chicken Masala - from Live To Eat


When I have a chicken urge I take refuge in Malluspice's pages and had always been a satisfied customer. Armed with this confidence I tried out a chicken recipe from another blog - Live To Eat. The recipe was a little different from what I am used to and reminded me of a pork vindaloo recipe that we have tried sometimes. It came out very well with nicely blended flavors in an appealing color and goes totally with any kind of carb you have at home!!. I can see this will be a keeper. I am repeating the recipe here for my own reference. I scaled the measures up to go with the quantity I had.

In The Mix
chicken : 3 lbs cut into pieces
red onion - 2 chopped
tomatoes - 2 diced
cloves - 12
cardamom pods - 6
cinnammon stick - 3" thin stick broken to pieces
curry leaves - 1 sprig or 2
salt to taste
oil - 3 to 4 tbsp
water - 3 to 4 cups
To Grind: dry red chilies - 22
garlic pods - 12
ginger - 4" piece
mustard seeds - 2 tsp

How To Do

Grind the 'to grind' ingredients in a blender with little water. I was hesitant about using so much chili but the result was wonderful. Heat 1 tbsp oil in a pan to brown the onions and set aside. Heat 2 tbsp in the same pan, add cloves, cardamom and cinnamon and saute. After a minute add the ground mix and slow roast till oil separates. Add chopped tomatoes and stir till tomatoes are cooked. I added salt at this stage.

Add cut chicken pieces and mix well so the pieces are coated. Fry to brown. Now add onions and curry leaves and stir for another minute. Add 3 cups of hot water to the pan, mix well and cook covered in medium heat.

Goes with anything. Thanks to Live To Eat for a yummy recipe .