Sunday, January 16, 2011

Brioche!


How about a loaf of fresh baked brioche bread for the 3rd anniversary of this blog space? The time is already into the next day but only just got a chance to sit down here as class projects and recitals are in full swing. 

Once the baking bug bites, even if you are not a gifted baker like spicyana, the desire to bake a loaf of bread starts to take root:-) This happened to me a while ago. I don’t have a bread machine and I had this feeling that making bread will take a lot of work. Confession time….I never make chapatis since I don’t know how to and so kneading is not a natural step for me. I will get to it some day because we do have a base and roller just for the purpose:-) For the moment COSTCO or Indian Grocery stores will do just fine. 

There is one item I always beeline for in the bakery section. Mini Brioche buns. Ummm…Yummmm. So when I saw a recipe that said fast brioche, I printed it out to try whenever I have the time. That time finally came around and I am very pleased with the results. For cosmetics effect, next time I will take the bread out of the oven a little earlier and will not brush so deeply with beaten egg. But the taste of the light and fluffy Brioche is well present beneath the exterior and so it turned out fine..

I think practice make perfect is true especially when baking your loaf of fresh bread. Almost like Appam. Brioche does not need as much flour as regular bread. There is an interesting story about this in Wikipedia. Scroll towards the end of the page. Poor executed Queen Mary Antoinette is always attributed the heartless quip : "let them eat cake" when she was told that the people do not have enough bread to eat. It turns out the mindful lady said "let them eat brioche'.  It takes less flour of course! Unfortunately having no equivalent for brioche the word got turned into cake and look how it changes one's perception of this historic figure…...So here is the recipe which I hope the original site and recipe author will be OK with to reprint here. Slight convenience adjustments as always are present.

In The Mix
all purpose flour - 1 and 2/3 cup
active dry yeast - 3 1/4 tsp
granulated sugar - 3 tbsp
salt - 1/4 tsp
warm milk - 1/3 cup
softened, unsalted butter - 2 3/4 (keep at room temp a few hours earlier to soften)
eggs - 2 beaten

to coat the risen dough
granulated sugar - 1 tbsp or less
egg - 1 beaten

How To Do 

Mix the flour, yeast, 3 tbsp sugar and salt in a bowl. Gradually add in warm milk, butter and the 2 beaten eggs. Knead until the dough is smooth. This is where I am not sure if I did all that was needed. Read kneading disclaimer above..The dough did pull away from the sides after a while and so I hope that was right. The dough felt very flexible. Cover the bowl and allow the dough to rise. You can go to the Library or finish reading that book while waiting. About 2 hours later or until the dough doubles its size is when the next step starts. Having had no prior experience, I am not sure if my dough got as smooth as it should be. Here is a picture of the risen dough in the bowl.


Grease a 9"x5" pan with baking spray or shortening. I used baking spray due to lack of time but will use my trusty shortening to grease next time. Preheat oven to 400 degrees.

Coat a cutting board or the likes with flour and move the dough onto it. Punch it down a few times. I divided the dough into 2 equal sized balls instead of 3 to make it quick. Roll each ball into a 10 inch long rope and braid them together. This looked really good! Tuck the ends and place the braid in the greased pan. The dough can also be made into an oval instead of a braid. Looking at the eventual shape of my loaf I should have just done the oval! Cover the pan and let rise for an additional 1 hour. Should double in size again.


The next picture is of the risen dough after the second time. See how the braid lines are already blurring. Using 3 braids as suggested in the original recipe would have given me better definition..


So get the remaining beaten egg and sugar ready. Remove the cover and gently coat the dough with egg  and sprinkle with some sugar. Place in the oven and bake for 10 minutes. Reduce heat to 350 degrees and bake an additional 25 minutes or until brioche is golden brown. Let cool for 5 minutes in pan and move to a cooling rack. Mine didn't stay much on the rack and was halfway finished in no time. The smell of course is wonderful. The feeling even more so! I have good mind to try the regular bread too but I am fascinated by the varieties of french bread for the time being....


Wednesday, December 29, 2010

Tea Ceremony & My Girl's Grape Juice Recipe


It started out rather innocuously. From an inconvenience I felt once when making several cups of tea one at a time in the microwave. Making it the old fashioned way on the stove was just too slow for that day. I thought if I could get a teapot small enough to get in the microwave and large enough for a few cups of tea I could just pour it all out in one stretch. As with all such things, the idea stayed just that for a long time. Then something brought it back to the top and I made an impulsive buy of a teapot  only to find it too tall for the microwave! That got returned and the whole plan got discarded. At least for the time being. Last week we drove to an outlet mall that we hadn't visited in the longest time and I spent some time in a favorite store of mine. The Corelle Outlet. You can find all sorts of cute kitchen stuff there. Many Indian parents shop there before their return trip to get some unbreakable everyday stuff for a good price. I bought some stuff that I liked and then I remembered the teapot. My son spotted this cutesy little guy and the decision to buy was immediate.


As luck would have it I spotted something else on the shelf. The glasses that reminded me of those roadside teashops where tea was always served hot with a flourish or thud in one of these!  My dad depended on them to quench his thirst when going on long trips. So we came home, washed teapot and glasses with soapy warm water and our tea ceremony got started. It will last at least for the duration of the holidays when time and temperament seems inviting for such an act. I had planned on using my lovely teacups but once I got the glasses, they were the natural pick:-)

Here is how we do it. Around 4 to 5 in the evening, kids and Mom gather in the kitchen. Mom gets the teapot and kids get the glasses, help with pouring 2.5 glasses of milk plus 1.5 glasses of water. Add in 5 tea bags and 4 tbsp of sugar, close the lid and microwave for 4.30 or more. Now you can let it sit in there and steep or take out depending on your needs. Remove the teabags, stir the sugar and pour out carefully into glasses. Make sure eager hands touching their glasses "for the same amount of tea as parents" don't get spilled over. Call Dad and gather round the table to sit and sip the tea. All of us are enjoying this very much. Who would have thought? Bring on the holidays anytime I say.


My Girl's Grape Juice Recipe
She is always busy if she gets the board and the marker. This time when she was done this is what we saw.  A recipe for grape juice. Thought I'll post it here. 
 

Above picture is an illustration of the method. Recipe follows:

I did ask her what to do once you have all the listed ingredients to get the grape juice. She gave me a look that said, why ask about something so basic!! I'd say remove skin from the grapes and put all in the blender is what she meant:-)

Friday, December 24, 2010

Merry Christmas & A Happy 2011!


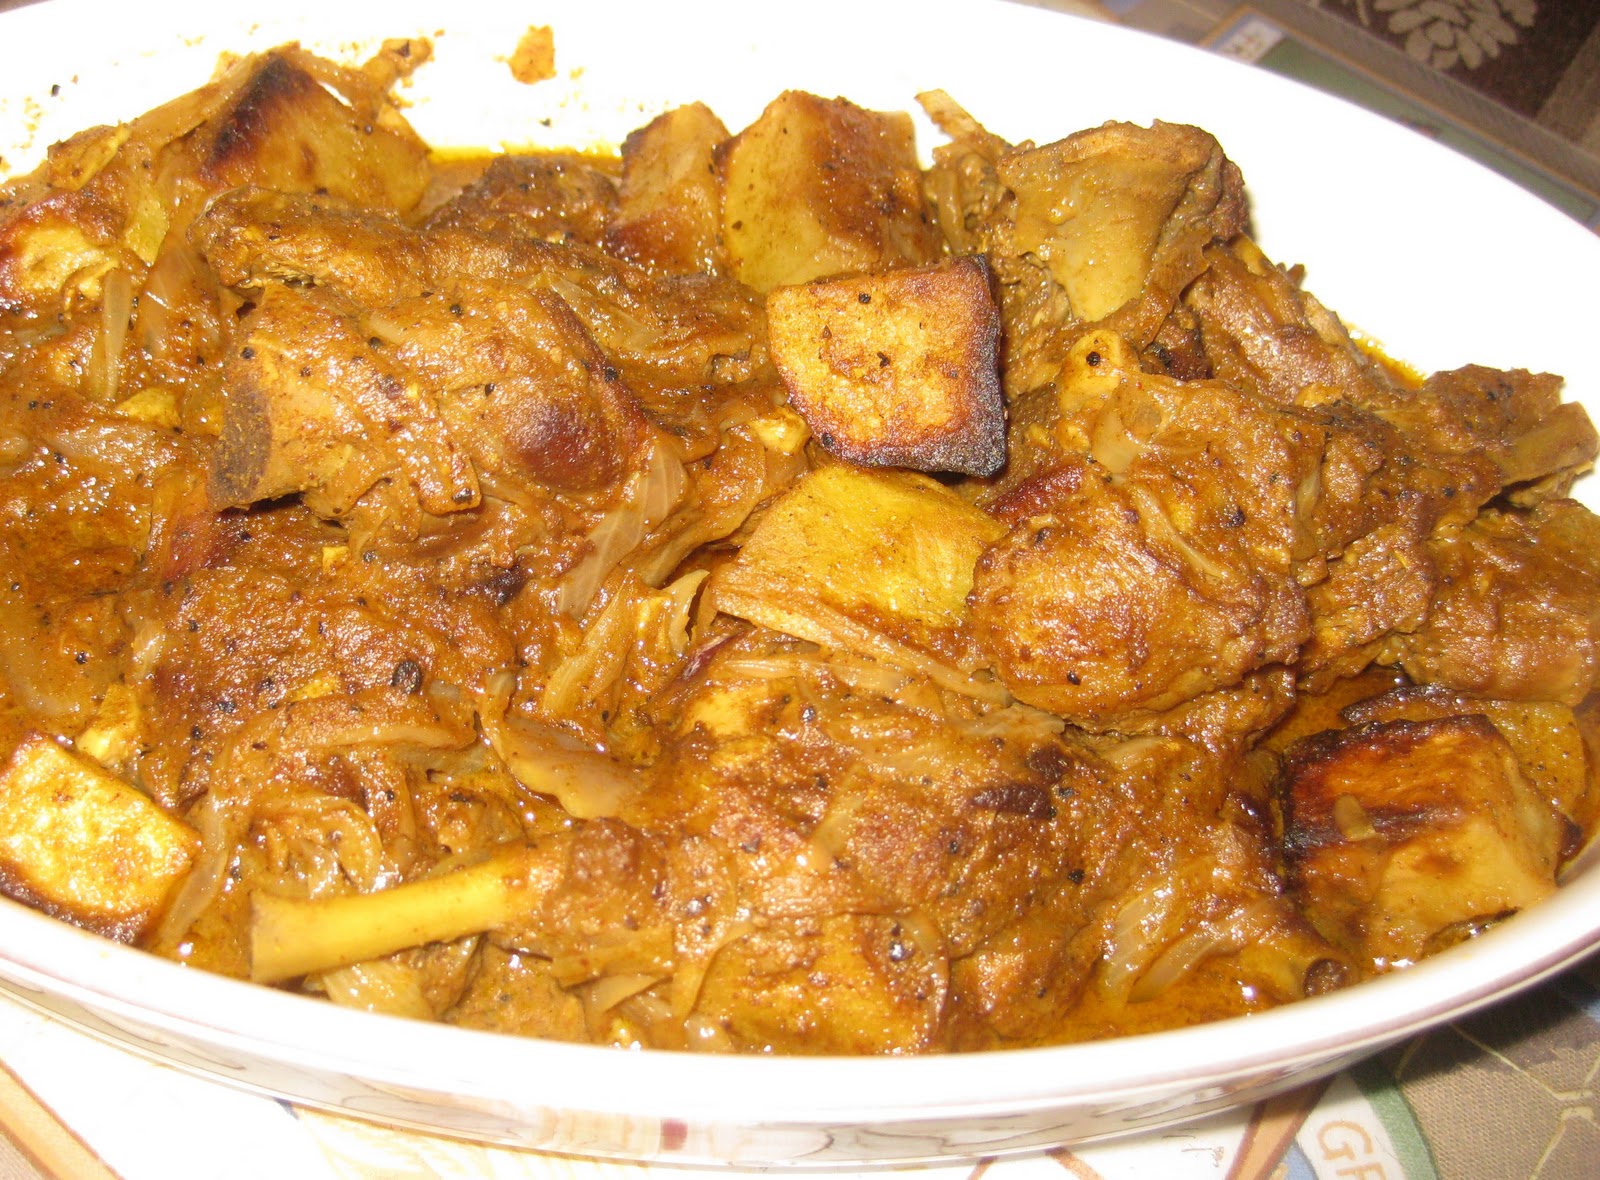
Stars sent lovingly from India have been hung up with lights and all. See one of those above. Just ignore the dark wires:-) Nativity is setup, appam batter is ready, stew pieces are cut and duck roast is done. Fruit cake has been distributed and gifts are under the tree. Now all that is left is for Santa to visit and for us to attend Mass. Did I say that I love holidays especially guilt free ones with no pressure from work? Hope the holidays are going well for everyone and that Christmas is indeed Merry. Wishing everyone a wonderful New Year too . A picture of our roasted duck is below.

Oven Roasted Potatoes
I oven roasted  the potatoes in the oven instead of frying in oil this time. A much better and easier way to do it. Here is how:

Preheat oven to 475F
Just peel and cube 1 or 2 potatoes. You could also cut them into circles as before.
Sprinkle some oil, mix and sprinkle some salt.
Spread on a cookie sheet and bake for 25-28 minutes.
If doing circles reduce the time to 12-15 minutes and check.
Let cool for potatoes to come off the sheet and add to the roasted duck curry. Done!


Wednesday, December 22, 2010

Crab Stir-Fry/Njandu Ularth and Crab Curry


Crab in any form is yummy especially so for my husband. We bought a nice bunch of cooked crabs from Costco and it was up to me to make something out of it this time. I was a little weary due to the disastrous crab preparation I perpetrated upon the household the other day from two rather expensive cans of crab meat. But that is when Mrs. KMM can truly come to your rescue. She had a Njandu Ularth recipe in her Nadan Pachakarama and I followed mostly except for the quantities and one other change. I did not shell the crabs. Used them as they are which is preferred by the Main Crab Eater in the realm. My girl and I are used to this too. My boy stays clear of the whole thing at this time of his life. Maybe soon.. Here is the recipe

In The Mix
crabs -3 lbs (cleaned, cooked and separated into pieces)
mustard seeds - 1 1/2 tsp
curry leaves - 2 or 3 sprigs
big red onion - 2sliced
torn dry red chili - 2 tbsp(ran out of this so i added the powder form below)
dry red chili powder - 1 1/2 tbsp
garlic - 10-12 cloves crushed and then gently sliced if required
pepper powder - 2 to 2 1/2 tsp up to your spice tolerance (too lazy to crush whole pepper mentioned in recipe)
kudampuli - 2-3 pieces in 1 cup of water (cleaned and heated in a microwave with the water - my Mom)


How To Do
I am glad that cooked crabs are easy to find. Not sure if I'd be this willing to venture into crabland if I also need to deal with live crustaceans! To deal with the cooking, let us go with Mrs KMM. She says to put crabs, turmeric powder and salt into boiling water and cook for about 1 hour.  Cook until the shells turn orange. Put cooked crab into cold water to keep the flesh firm. Then she suggests to shell the crabs which I didn't do.

Moving onto what to do once you have cooked, separated and unshelled crabs ready to roll -
Heat oil in a pan and break mustard. Add curry leaves and onions. Add salt to mix well with onions. Saute for a while until onions turn translucent and then add red chilies including powder. Keep on sauteing and add garlic and then pepper powder. Saute some more till they have a pleasing look all together.


Now add the kudampuli with its water and then add crab pieces. Mix well together, cover and cook for 4-5 minutes so the crab meat imbibes some of the flavors. Open and dry out well in the heat before taking out to enjoy with hot cooked rice. Yum! The shells are easy to break but make sure to keep an empty platter for all those shells to collect in. This can pile up before you have time to think!

Crab Curry
I had some leftover crab after taking what was needed for the Ularth. So went ahead and cooked it with the egg curry recipe and below is the result. With this ularth and curry any memories of the previous crabby incident has been erased forever:-) Just replace the eggs with about as much of cooked crab in shells (about 1/2 lbs?). Add a bit of vinegar to taste in the end and voila!


Wednesday, December 8, 2010

Hello


 Nope, no new food posts yet. Just saying a hello to say we are eating but just not anything new:-) I have some in mind but picture taking opportunities are hard to come by since the dark winter evenings are here. Hope Thanksgiving went well for those who celebrated. We made some yummy duck roast in honor of TG a week ahead and happily skipped the Turkey this year. Went to Grand Canyon via Las Vegas instead. Watched Cirque De Soleil's Ka while at Las Vegas. Not bad. Kids totally loved all of it. Moving vertical and horizontal stages were awesome! Grand Canyon was too cold by sunset watching time. We barely managed it. Yet, judging by the crowd I am not sure I want to do the trip when the weather is more pleasant. Too much crowd is not fun in the buses as well as with kids. GC indeed is a sight to see. I kept wondering about the people who had never heard or seen pictures of it blundering on to this brilliant brilliant beauty of a canyon carved by the Colorado River jumping at them. Awe inspiring. Next time maybe we will trek down a bit. We went to the south rim. Didn't drive to the west rim where the Skywalk Glassbridge is.  The 12 hours driving was rather fun with us all together. Holidays are special to all I guess.  Can't wait for the X-mas hols now. Nativity is set and the tree is up. X-mas here we are!! Well, almost. Must be the overworked employee in me getting excited:-) Projects have cooled down to a manageable level so shouldn't complain.

Come to think of it, I do have some food related stuff to relate. Did I tell you about the new Waffle Iron we got sometime back? I can't find the exact model but this one comes closest.

Better than reheating those frozen store bought waffles. Possibilities are endless with the toppings: honey, fruits, butter, jelly, sunny side up, bacon. All goes well with a crisp yummy waffle. I get this waffle mix and simply follow the recipe on the can.


Friday, October 8, 2010

Mrs. KMM's Fish Pappas


I have a small set of fish recipes that I am happy with. But that doesn't mean one should cold shoulder new recipes. So it is that I took up my trusty old copy of Mrs KM Mathew's 'Nadan Pachakarama'. Leafing through a few recipes that I have and not tried, the word 'pappas' caught my eye. This was not a common preparation at my home but I knew it goes well with Thirutha/Kanampu (Mullet) or Karimeen (Pearl Spot). We love Bass in any form. Be it striped or black. My son's day is made when we fry a Bass. It didn't take long for me to connect the tasty Sea Bass to this awesome recipe.  We buy it fresh from the local Chinese store. The first time I made it, taste was good but gravy looked watery and something felt absent. So when family (includes HAunt who is our top advisor on food matters here) came for a short visit I decided to give this one more concentrated effort and it was worth it. I tripled the recipe and made small updates to the original steps. Recipe follows:

In The Mix
fish - 2 striped bass : cleaned and cut into pieces (~1.5 kg)

coriander powder - 6 tsp
kashmiri powder - 1 1/2 tsp
turmeric powder - 1/2 tsp
fresh ground pepper - 1/2 tsp or more as needed

olive oil - 1 tbsp or more
mustard seeds - 1 tsp
methi (uluva) - a few

medium sized onion - 2 sliced
ginger - 1.5" piece peeled and sliced lengthwise

garlic cloves - ~25 thin cloves (slice/crush large cloves)
green Serrano chili - 4 to 5 halved lengthwise
curry leaves - a sprig and a half

water - 4.5 cup or more as needed

kudam puli (Garcinia cambogea )  - 8-9 petals washed thoroughly in warm water to remove any smokiness
canned coconut milk  - 1/3cup or less 


How To Do

Heat 1 tsp oil in a flat bottomed pan and gently fry the fish pieces on both sides. I didn't score the pieces. About 1 min to each side is more than enough. Use two spatulas if necessary so as to not break the fish. Remove from heat and set aside.

Combine the 4 curry powders including pepper in a bowl with some water and keep aside.

Heat remaining oil in a pan and break mustard seeds. Then saute onion, ginger, garlic, green chili and curry leaves by adding to the pan in that order. Onions should start to brown and chili should still have some color left. Add the masala powder mix and saute in low to medium heat. This will take a few minutes. Once the aroma start to rise, add water and mix well together. Add salt at this stage so it can be mixed well with the gravy. Now add the fish and kudam puli pieces. Gently mix taking care not to break up the fish. Boil once on hi and lower heat. After this, it is better to just lift up the pan and rotate once or twice to mix things up when needed. Check and add salt if needed to balance the puli/sourness. Let the gravy come to the desired consistancy at this rate on medium to low heat. Pieces should look well coated with gravy.

Add coconut milk and mix by rotating the pan. Use a fork gently to bring the milk everywhere and rotate again. Boils once and remove from heat. Remove some puli pieces if you are not big on that part of the flavor. I remove about 2/3rd of the pieces at the end and only keep 1 or 2 in the setting curry. Enjoy with hot rice, vegetable thoran and buttermilk curry/moru kachiyathu. Hmm... Yum....Bliss here I come!!


Monday, August 23, 2010

Pan Seared Chicken Legs


I know I know. It's been a while and I have nothing but the same old excuse to put forward. But hey, to make things a little fun let me talk about something new. At least it created a lot of excitement in our little household. I am talking about the 'Next Food Network Star' from Food Networks. I had watched Season 1 long time back and then this season 6 is the next one I got to watch. Good timing since the final Star ended up being a cook with Indian background.  Liked all the finalists but was extra glad to see Aarti win. Missed her first episode this last Sunday but won't be missing anymore since it is being recorded. I am looking forward to her American recipes with Indian flavor in the hopes of getting the kiddos back on track with homemade food. Little tummies are being monopolized by burgers, pizza, cold sandwiches and the likes lately. Keeping to this spirit I tried out a chicken recipe that was on the Food Network site by Cheryl Smith with a mild Indian update and it worked wonders and earned 4 fans right away!

I hope it is OK with Food n/w and Cheryl Smith for me to write it up here.

In The Mix

chicken drumsticks with skin on - 6 (recipe calls for chicken breasts. tried both & prefer drumsticks)
olive oil - 3 tbsp (to be used in halves)
kosher salt - to taste
freshly ground black pepper - enough to cover the pieces well
herbs - enough to sprinkle on (had no fresh herbs. dried rosemary and thyme worked well and dried basil and parsley equally good)
garam masala - 1/2 tbsp (from 1:1:1 mix of cardamom:cloves:cinnammon powders)
garlic cloves - 8-10 peeled and crushed


How To Do

Preheat oven to 400F.

Wash and drain the drumsticks well. If using chicken breasts, I found cutting into large pieces resulted in yummier fare. Cover the pieces with half of the oil. Make deep scores in the meat if needed. Now season each piece with a good amount of pepper and salt. This is very crucial. Don't be shy with the salt and pepper. Add in the garam masala too at this time.

Heat oil in a pan and add the pieces one by one with skin side down. Sprinkle on the herbs and add garlic to the oil.


Cook over medium high heat. When the skin gets golden brown, turn over and repeat for a minute or 2. Now spread the pieces on a baking pan and bake for about 15 minutes or as needed. Remove from oven, drain on paper towels and get ready to eat the tenderest juiciest chicken ever. Perfect with yogurt and rice/vermicelly pulau. What makes it even easier is to do the frying part in an oven ready pan. Then we can just push the whole thing into the oven right after the frying step and baking time gets down to 8-10 minutes. Just great!