Tuesday, December 8, 2020

THANKSGIVING 101 : Part 3/3 The Feast


The TG-day is here but good news is, you can afford to wake up a bit late since you are a prepared cook this time around. Today we are preparing all the things that make the thanksgiving table what it is. A family feast!

Thursday : (Start around 10AM)

First thing to do is to set out 2 sticks of butter and one 8oz pack of cream cheese to bring those to room temperature. 

Slice 7oz of mushrooms, chop 1tsp each of parsley, sage, thyme, rosemary and set aside. Crush and chop 3 garlic cloves. This is also the time to chop 2 onions, 2-3 celery sticks and some parsley if you are not using pre cut (~24oz) mix from the store.

Take out all shelves from the oven except one. Keep it in the middle for all cooking except for the turkey when it should be in the last slot.

Bring out the roasting pan and fat separator. Prepare some fresh sprigs of sage, rosemary and thyme for the turkey.

Corn Bread

Since we want the oven to be free for the turkey, most of today's activities are with this in mind. Make corn bread from the box following instructions. Krusteaz is my new favorite brand for corn bread. Soft and delicious every time. 

Mash Potatoes & Stuffing

While corn bread is in the oven, start boiling the pot of water from yesterday. And start peeling the potatoes. Cut each into 2 or 3 pieces, add to the boiling water after adding enough salt. Cook uncovered  on medium heat, set timer for 20 min and go on to the next step.

While potatoes are cooking, brown 1lb. of sausage in a large pan on medium heat for ~7 min and set aside in a plate. Melt 3 tbsp of butter and add 24 oz. of onion-celery-parsley mix and cook uncovered for 10-12 min. 

If the first 20 minutes of potatoes are done, then cover and cook for another 15 min or longer until you are able to come back to it. Keep an eye on the corn bread timer.

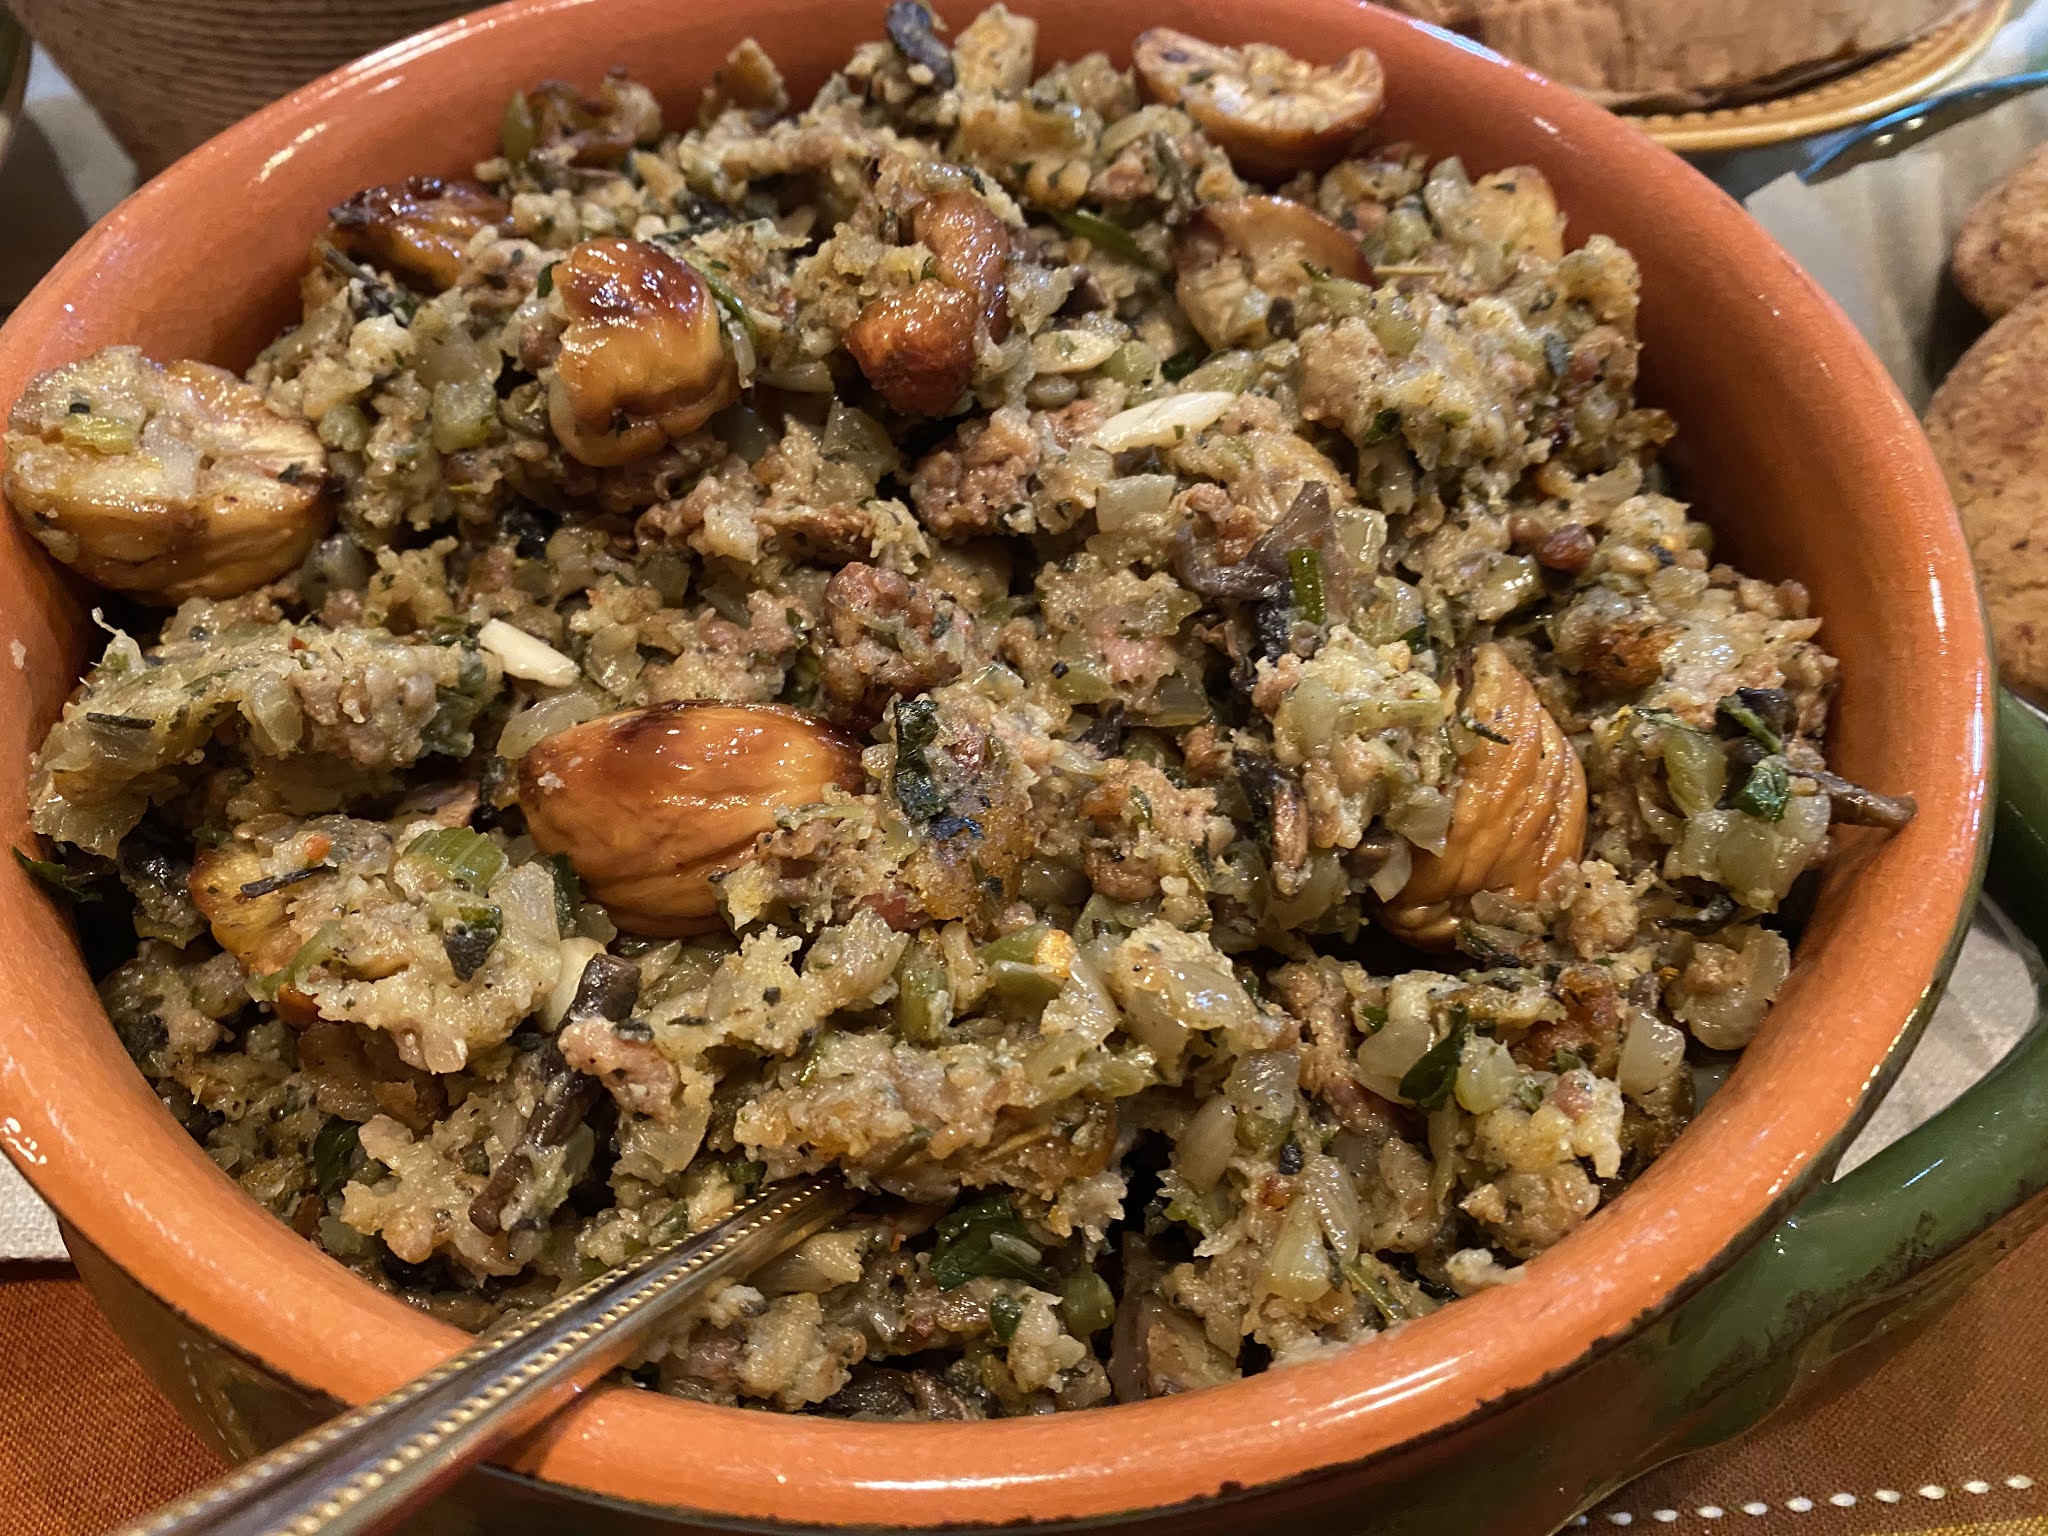
Add garlic-sage-thyme-rosemary and sliced mushrooms to the stuffing and cook uncovered for another 12 min. Add about 2 tsp each of salt and pepper to taste. Grease a large baking pan with 1 tbsp of butter and set aside for stuffing.

Add 1/4 cup sherry, roasted chestnuts and mix well together. Add back in the sausage, and 10-16oz stuffing mix and mix together with 500-600ml of chicken broth. Add to the greased pan, cover with foil and set aside. We'll come back to it after the turkey is roasted.

Remove corn bread from the oven once done and set the temp to 425F for roasting beans/asparagus.

Drain the potatoes and add back to the same pot, mash on low heat if too moist for 6-8 min and turn off heat. Add 1 1/2 sticks of butter, 8oz cream cheese, 1/2 cup half and half and mash together. Add 1/2 tsp seasoned salt, enough pepper and fresh herbs if any, mix together and set aside in serving dish. Mashed potatoes are done!

Roasted Beans/Asparagus

Cut off the edges of beans, lop off an inch or two of the asparagus, wash, drain and dry on paper towels. Toss with olive oil, salt and pepper, place in single layer on a foil lined cookie sheet and cook at 425 for 3-5 min on each side. Keep covered in foil and set aside in an oven safe serving dish. Set oven temp to 500F which shouldn't take long since the oven was in full use up till now.

Turkey

The breast meat weighed about 7 lbs this year. First combine the herb mix that came in the brine pack with some canola oil and set aside. Now it is time to take out the brining turkey, clean and pat dry it with paper towels. Rub generously with the oil mix and tack on as many sage, rosemary sprigs as possible. Cover with foil to get the shape in for later stage and remove foil. 

Then roast as usual at 500F for 25 min uncovered with 1/4 cup water in the pan. 

Bring oven down to 350F, add another 1/4 cup of water and insert thermometer so that the temp is measured at the lowest point in the meat (~50-60). 

Cover with foil and roast again for 1 hour 45 min till the thermometer reads 160.  The 1/4 cups of water added to the pan helped retain moisture and also helped to create some semblance of drippings at the end. I think I will take it out around the 1.5 hour mark next time when the thermometer showed 142 and it can continue to cook outside the oven to retain even more moisture. During this time when turkey is roasting in the oven you can quickly clean the kitchen, take that much needed shower and even start to set the table. Once turkey is done, remove thermometer, keep covered and let rest before carving.

While turkey is resting, add the stuffing pan to the oven and set to bake for 20 min. Start the gravy step at this time.

Gravy

Remove the turkey to cutting board and place the pan on the stove. Will need two burners in parallel on medium-low heat. Whisk the drippings and add 8 oz red wine and 24 oz chicken broth at the same time to the pan. Continue whisking for 2-3 min and transfer to a 4cup fat separator with stopper inserted. Discard any extra liquid. Wait 5 min for the fat to settle on the top. Turn off the heat.

Check on stuffing and if the 20 min are done, remove the foil and bake uncovered for another 20 min. Add the beans/asparagus pan to the oven towards the last 5 min to warm it up. Even the mashed potatoes can be warmed up here if it is in an oven proof dish.

Back to the gravy. Once the fat is settled, remove the stopper and pour out the bottom liquid to another container bringing the fat to the bottom. Add 1-2 tbsp of the fat back to the pan and discard the rest. At medium heat, add 1/3 cup all-purpose flour by sprinkling around the pan and whisking vigorously. Now add the liquid back in small amounts and continue to whisk until blended well. Do this for 5-6 min, add salt and pepper to taste and herbs if any for flavor. Remove from heat and pour into serving container.

Crescendo!

Remove all the items from the oven, carve the turkey and finish setting the table. You are ready to enjoy the most delicious meal ever!

Monday, December 7, 2020

THANKSGIVING 101 : Part2/3 The Preparations


I went with the turkey breast again this year instead of the full bird. The absence of the roasted bird was felt on the table when the cooked breast looked more like ham than turkey. But with enough white meat for all and comparatively less effort to clean and brine, this will be the go to from now on. 

Preparations

OK, now that our shopping is all done, let us start with the preparations that one can do before the actual day of cooking and dining. The best part about organizing this is the fact that Thanksgiving (TG) is always on a Thursday. So we can start with that in mind. Starting from Sunday here are the various steps you can do to prepare ahead.

Sunday

Buy the Turkey 

Pickup or buy the whole turkey or turkey breast on the Sunday before TG. If you are ordering online, do that a week or two before so that you can pickup on the day of your choice. Bring it home and keep refrigerated. 

Buy TG groceries 

Make sure to have enough space in the fridge before you go shopping. Make use of the shopping list from my previous post. Take a list with you when you go to get the turkey. The list must include a brine mix because you will need that first.

Monday

Relax.

That is right. This is a step free day. Unless you want to switch today with Sunday.

Tuesday

Prepare the Brine 

Dissolve the brine mix into 1.5 gallon of water, boil for a few minutes and set to cool. You can add some orange peel for extra flavor while boiling. Keep refrigerated once cooled. Make sure you have at least 2 trays of ice in the freezer and tell the family not to deplete it before Wednesday.

Wednesday : (Start around 6 or 7 PM)

Make Creme Brûlée for dessert (optional)


Since we are not big pie fans, we opt for various desserts like creme brûlée, snicker doodle cookies or pound cake. This one is rather easy to make if you have 8 ramekins and a butane torch.  Preheat oven to 325F. Heat some water in a large pan/kettle. Now bring 1 quart heavy cream with one vanilla bean and its pulp to a boil on medium high heat and set to cool for 15 min while you whisk together 6 egg yolks and 1 cup sugar. Add the cream mix gently while stirring, pour into ramekins and place in a larger pan with hot water poured to reach half the height of ramekins. Bake at 325 for 40-45 min, take out while the middle is jiggling and set to cool in the fridge. Layer with sugar and torch the top when ready to eat.

Make Cranberry Sauce 

This is the right time to make cranberry sauce if you are planning to have it homemade. Wash & drain the cranberries, boil once with 1 cup sugar dissolved in 1 cup of water. Add orange peel & 1-2 crushed cardamom. Keep it on medium heat and stir occasionally until jelly like consistency is reached. You can do the next step while this is going on.

Roast Chestnuts

My stuffing requires chestnuts so I roast 8-9 chestnuts in the air fryer after making an X on the flat side with a knife. Add these to the air fryer at 390 or oven at 425 and roast for 20 min. While chestnuts are roasting, go on to the next step.

Brine the Turkey

Line a bucket or large container with a brining bag, add half of the cold brine and some ice cubes. Then add the washed and cleaned turkey without giblets etc. and pour over the remaining brine and ice cubes, tightly close the brining bag and keep refrigerated or in the garage if it is cold enough. Make sure turkey is fully immersed with a weight on top if necessary. Keep breast meat in the net that it came in.

Finishing Up

If the chestnuts are done, keep them wrapped in aluminum foil for 5 min while you attend to the cranberry on the stove.

Remove cranberry from heat, discard orange peel if any and refrigerate in serving container once cooled. 

Wear food grade gloves and peel the chestnuts while hot because that is the easiest way to get it out. Halve the chestnuts and keep them wrapped in the foil for Thursday. No need to refrigerate.

Take a large pan, add enough water and keep on the stove for Thursday's mashed potatoes.

Make sure you have 5 lbs. of potatoes ready. Place dry sherry and red wine bottles within easy reach for stuffing and gravy needs. Keep stuffing mix (10-16oz) and chicken broth (2 boxes of 32oz) also within reach. Set hot sausage to thaw in fridge if frozen and go to sleep.    


Sunday, December 6, 2020

THANKSGIVING 101 : Part 1/3 The Shopping List


Not to cut to the chase, but it takes quite a few steps over a day or two for this delectable plate to be possible. For this year's Thanksgiving (TG) post, I wanted to add those steps here in chronological order. As you can see, it has three parts and starts with the shopping list. This will help you to create that special TG Feast for your loved ones with less stress and more joy.

TG List
  • turkey                      : 7-12 lbs (breast/bird)
  • hot Italian sausage : 1 lbs (no casing)
  • eggs                        : 6
  • half & half              : 1/2 cup
  • heavy cream            : 1 qt
  • butter                      : 2 sticks (1 cup/16 tbsp)
  • cream cheese          : 8oz
  • rosemary                 : 2 or 3 bunches
  • sage                        : 1 bunch
  • thyme                     : 1 bunch
  • parsley                    : 1 bunch
  • garlic                      : 3 cloves
  • white mushrooms  : 7 oz
  • 1)yellow onions     : 2
  • 2)celery                  : 2 or 3 sticks
  • 3)parsley                : 1 tbsp
  • (can sub 1)2)3) with ~24oz pre-cut mix if available) 
  • chestnuts              : 1/2 cup
  • oranges                 : 2
  • cranberries            : 12oz pkg
  • potatoes                : 5 lbs (Russet potatoes)
  • beans                    : 1/2 lbs
  • asparagus             : 1 bunch
  • low sodium chicken broth : 2 boxes (32oz. each)
  • Hawaiian bread rolls or any dinner roll
  • brine mix with brining bag & herb rub
  • stuffing mix         : 10-16 oz  
  • corn bread mix    : 1 box  
  • all purpose flour : 1/3 cup  
  • vanilla bean        : 1
  • dry sherry            : 1/4 cup   
  • red wine             : 8 oz.
  • cardamom          : 2 or 3
  • sugar                  : 2 cups
  • canola oil    
  • olive oil
  • salt
  • seasoned salt
  • kosher salt
  • ground pepper

The last few items are sure to be in your pantry but it doesn't hurt to have it spelled out here. So when you are ready to go shopping, just print this out and take it with you. Next post is all about preparations and dishes you can make ahead.

Saturday, May 16, 2020

Garden Post 2020

Just a post to show off our garden in spring and to muse over a few things. Month of May is my favorite month with the arrival of spring and nature in splendor everywhere you turn. It's been 5 years since my mom left us forever. Coronatime gave us siblings an opportunity this year to zoom together in a prayer of remembrance💖. My daughter had a milestone birthday this month and it was great that all four of us had this day together to celebrate it. Roses from the garden held centerpiece in the celebration.


Bearss dwarf lime camouflaged as a flowering plant on the left, clematis vine on the right and the trumpet vine below add charm to our backyard.


Aren't strawberries like flowers too? At least they are as colorful. Can you spot the little visitor hiding in plain sight? They are in abundance this year.


       .        
When has a rose ever needed an introduction? They rule unchallenged. 
Below is the grapevine coming along nicely. Harvest time is around September.


Is it absurd that a purple clematis and a weed flower give similar pleasure? So true that beauty lies in the eye of the beholder!


No backyard is complete without a nasturtium which is not only a beauty, but also edible and used in food decorations. And glad to know that the wild California poppy thinks our backyard is good enough to make an appearance every year. Leaving a slice of home made cake here for you all to enjoy.


Thursday, May 14, 2020

Leftover Wrap Anyone?


It is a mark of these times that the instinct now is to save all remnants of edible food instead of forgetting about it and throwing away when moldy. This wrap is a great way to bundle together everything you have leftover that is not enough for any legit use and re-avatar it as a quick lunch or dinner option.

In the Mix

12" whole wheat tortilla - 1
cooked rice : 3 or 4 tbsp or any other carb
baked diced fish - 1/2 cup or any other protein will do
yogurt : enough to spread over
broccoli steamed - 5 to 6 florets
cilantro - optional

How To Do

Heat the tortilla at medium high on a flat pan for 1 to 2 minutes on each side. Can heat this up based on your crunch preference. Turn heat off and start adding the filling ingredients one by one. Spread it evenly towards the center as shown here.


Fold over on three sides, wrap with parchment paper and enjoy this hearty meal!

Saturday, May 9, 2020

Easy Uzhunnu/Methu Vada with Tomato Chutney #coronatime


Unlike the ever popular parippu vada, making its cousin the uzhunnu vada takes some planning especially if this is your first time. So I conducted a thorough research mostly limited to you-tube food channels featuring vada recipes. The ingredients were common among the channels with some variations. But each had a trick or tip to make the process a bit easier, all of which I embraced wholeheartedly. VahChef, Mias's kitchen, Veena's curry world, Salu kitchen  and mrudula's cookbook were some of these channels. One thing I realized was that since I have a wet grinder I am better equipped to make the uzhunnu vada than most! With a wet grinder the batter gets naturally aerated and needs no hand beating.

Tips:
1. Soaking urad dal overnight is ideal but soaking for 2-3 hours is sufficient to get a good vada. 
2. Vada batter needs the least amount of water and a wet grinder is best to make this happen. Food processors are ok but the batter may need aeration by hand.
3. If using a mixer/blender, grind in small quantities and add water by the tablespoon. The batter should be more coarse than fine in all cases.
4. Batter consistency is achieved when a dollop of batter dropped into a bowl of water stays afloat. If it doesn't, then beat the batter with hands to add more air and check again.
5. Adding 1-2 tbsp of rice flour makes the vada more crispy and helps to reduce water content in the batter 
6. Do not add salt to the batter until the very end
7. To make vada on the same day, you can add a pinch of baking soda to the batter without having to cover and wait for it to rise for 1-2 hours.
8. Vada will be flat on one side if made in a 12" pan as opposed to a wok shaped pan where it can float.
9. Always wet your hands before handling the batter for cooking so it won't stick to your hands
10. For convenience, place the rounded batter on a wet flat spatula and make a hole before dropping into hot oil.

In The Mix
urad dal - 2 cups (makes about 24 vadas)
water - 10 to 11 tbsp
rice four - 1 to 2 tbsp
baking soda - 1/4 tsp

shallots - 2 peeled and chopped
long green chili - 1 or 2 chopped
ginger - 1.5" medium sized piece, crushed and chopped
curry leaves - from 1or 2 small sprigs, chopped
cumin seeds - 1/4/ tsp
crushed pepper corns - 1/4 tsp 

salt - to taste
oil - enough to cover at least half of the vada in a flat pan or for the vada to float in a wok like pan. I used a flat pan this to make 8-9 vadas in one batch.

How To Do
Wash and soak the urad dal for 2-3 hours, drain and add to the wet grinder. Add 4-5 tbsp of water and start grinding. Add the remaining water and grind to a coarse consistency. Use a small portion and check to make sure the batter floats in water.

Add rice flour and baking soda to the batter and mix well. Now add all the remaining ingredients except salt and combine all together with hands. Add salt to taste.


Heat oil and a keep a bowl of water handy. Wet your hands and take a small ball of batter and place is it on the flat end of a metal spatula. Make a hole with wet fingers and drop gently into hot oil using the spatula.


Repeat to drop more vadas into the oil and turn over a few times to cook. Ideally 1-2 min on each side depending on the heat of your stove. Keep it on medium high heat. Remove with slotted spoon, drain on paper towels and enjoy with coconut chutney, tomato chutney or both.

For Tomato Chutney
tomatoes - 3 medium sized, quartered
shallot - 2 peeled and quartered
green chili - 1 or 2 halved
curry leaves - 4 or 5 leaves
chili powder - 1/4 tsp
turmeric - pinch
salt to taste
oil - 1-2 tbsp

Heat oil in a pan and saute all ingredients together. Cover and cook on medium heat for 5-6 minutes and set to cool. Grind all together and season with some mustard and curry leaves. Enjoy with piping hot uzhunnu vada.

Saturday, May 2, 2020

Teriyaki Chicken with Rice & Spinach #coronatime #campuscravings


My son's been missing some aspects of campus life ever since he came home and online schooling started. One day while we were talking, something reminded him of this teriyaki chicken bowl he used to eat at one of the many eateries close to the campus. Seeing how easy it was to make it, I gladly signed on. It was good that we had some chicken and spinach conveniently on hand. With long lines at grocery stores and lack of enough delivery slots at Amazon for WholeFoods, every food decision had to be made with some thought into the availability of ingredients. Turns out this is an easy to make dish where even the home made teriyaki sauce is easy to do!  Checked quite a few sauce recipes and finally settled on this one from cookingclassy  Made some spinach and basmati rice to go with it was a winner in the household. This wholesome meal is definitely here to stay!

In the Mix

boneless chicken breast - 1.5 lbs (chicken thighs are apparently more authentic)
olive oil - 1 tbsp
green onions - optional (I didn't have any)

For Homemade Teriyaki Sauce
soy sauce - 1/4 cup
water - 1/4 cup
honey - 2 tbsp
brown sugar - 1 1/2 tbsp
sesame oil - 1/4 tsp
garlic - 2 cloves minced
ginger - 2 tsp minced
rice vinegar - 1 tbsp
corn starch - 2 tsp

How To Do

Cooking rice ahead of time helps to serve everything hot once chicken and spinach are ready to go.

Wash, drain and cut the chicken into 1" cubes and set aside. Dry with paper towels

Mix the corn starch with rice vinegar in a small bowl and combine with no lumps. Transfer this and the rest of the teriyaki sauce ingredients into a large bowl. Whisk all together and set aside.


Heat oil in medium high heat and add the diced chicken. Cook on one side for about 3 minutes and flip over.


I turned each one over religiously. After about one minute into the second side, pour the prepared sauce over the chicken. Let cook for about 30 seconds before stirring. Cook to a total of 3-4 minutes on the scond side or until the sauce thickens to your liking.


Serve with spinach or any vegetable mix over rice and enjoy! My daughter likes spinach and so it worked out great for both kiddos. Below is a quick note on how to make this particular spinach.

Spinach (3 lbs. washed and drained) - 2 minute recipe
Saute' 3-4 cloves of crushed garlic in 1-2 tbsp of olive oil on medium high heat in a bowl large enough to hold all the spinach.
Add spinach and mix well together. Cover and cook for 1 minute.
Open, mix well again, cover and cook for another minute.
Add salt at the end, remove and serve hot after draining excess water.

Thursday, April 30, 2020

Kurisappam or Pesaha Appam #coronatime


This is being posted really late but I don't want to wait another year when I may or may not get a chance to make it again. Easter came and went rather quietly this year but I am grateful to have had the chance, time and mindset to watch all the masses and observe some dear customs like making this 'appam' for the first time. I really liked the services streamed from SS Peter & Paul Church Portaloise Ireland. Maybe because they were a web presence before Covid19 the service was catered to online viewers with clarity of sound and a prayerful ambience. I did find Pope's extraordinary blessing Urbi  Et Orbi quite moving too.

Kids were quite surprised when I talked about this tradition since they never had a chance to see it before. To be honest, as a kid this tradition felt more like part of a religious ritual that took place at home rather than a food event. That happened on the actual Easter day with crisp and soft flat appams and my mom's special chicken curry. This was more of a solemn occasion when my grandfather would cut the appam with the cross (kurisu) after prayers and distribute it to everyone around the table. A small piece of turmeric which we called the 'treasure' was hidden in the appam at the time of cooking and whoever found it in their slice was considered to have received a lot of luck for the coming year. I didn't do that this year though. The focus was just on making the 'appam' at least this once. Hoping for a chance next year to make this again.

The meal with this 'appam' is to commemorate Christ's last supper and the 'appam' represents the unleavened passover bread. There was a drink called 'paal' or milk which was made out of coconut milk to represent wine which I didn't do this time. Memories of my sister and me came calling. We started off the day by singing the 'puthen pana' about the 'unleavened bread a,k,a puliyathappam' which then was picked up next morning on Good Friday about Mother Mary's sorrow on her son's fate. This was almost continuous during the day with others joining in as needed. Along with the 'kurisappam' which is steamed separately, there were appams of the same genre steamed in banana leaves for general consumption.

My oldest sister had sent a recipe that was most similar to what we had at home and I also referred an old cookbook as well as many food vlogs out there. It's been so long that I am not sure if I really got the authentic taste but it came out better than expected. Planning to try this recipe from Mia's kitchen next year since that batter texture looks more familiar.

In The Mix
roasted rice powder - 1 cup
urad dal - 1/4 cup (fried for 2-3 min and soaked for 2 hours)
grated coconut - 1 cup
shallots - 2
garlic - 1 cloves
cumin seeds - 1 tsp
water - as needed for grinding

How To Do

Add water to rice powder and combine well together. Grind urad dal and add to the rice mix. Grind coconut, shallots, cumin and garlic and add to the prepared mix. Try to add as little water as possible. This is where I may have gone wrong a bit since the consistency was not as familiar. It should be coarse and thick. Check salt as needed. Set aside for 30 minutes. Do not let it rise because after all, this is unleavened bread.

Pour batter into a greased steel pan/plate with straight sides. I used olive oil to grease but may use coconut oil next time. Place a cross on top of the batter using two strips of the palm leaf from palm Sunday.

Boil water in a larger pan with a steamer insert at the bottom. Idli steamer is good if the pan can fit inside. Once the water starts boiling, place the pan with batter into it, cover and steam for about 15-20 minutes. Appam is done once a fork or toothpick comes out clean.

I had made some 'kozhukkatta' too to make up for not doing that on palm Sunday the previous weekend as demanded by tradition.


Saturday, April 25, 2020

Easy Banana Bonda #coronatime


I like to call it the banana nut bread of Kerala. Even the kids decided to give it a try when I called it by this name and liked it too! A perennial presence inside the glass cabinets of local tea shops in Kerala, this snack was my favorite over the equally good looking 'neyyappam'. Of course bonda cannot compete with the ever popular and crowd pleasing parippu vada or pazham pori. But every snack deserves its day and that day has finally arrived. And what unprecedented and trying days these are!

No matter who you talk to, where you look, the problems are the same. The entire world is on its knees because of a tiny organism.  Economies have ground to a halt and people are prisoners in their own homes. I pray that this shall soon pass from us.

On the good side of this global pandemic is the fact that all four of us are under the same roof again after my son leaving for college. Kids are schooling from home now and parents are working from home. Cooking for a full house with minimized options for buying out when also working full time is quite the challenge. I am sure this is not just my problem. I was like fish out for water the first 2-3 weeks. But now we have found our rhythm and I also find that one can be quite creative with minimum resources. And old habits shed easily in face of challenges. I no longer have any issues with bread kept in the fridge and small leftover pieces of ginger are plastic wrapped and saved for another time instead of just dumping it etc.

 Going out for groceries is akin to hunting for food where masks and sanitizer sprays are your weapons. The triumph you feel on scoring a carton of eggs or a gallon of milk before the hoarders find them is unparalleled. So also is that great feeling when at the dot of 12.00PM you are able to click into a grocery delivery slot at Amazon before it disappears in front of your eyes. Then comes the de-sanitizing regimen developed more for our peace of mind than anything else. Once the delivery person leaves the stuff at the door step, we wear gloves and bring it all inside the garage. Non-perishables are left in the garage where they stay until 24 hours for paper packaged items like snack boxes and 3 days for plastic covered items like bread and bagels. Milk, chicken and other packed perishables are sanitized with wipes and washed in cold water and dried before putting them in the fridge. Fresh vegetables are dropped contact free into a clean bag or container before refrigerating. Eggs go through their own special regimen where each gets sanitized, washed, dried and kept in clean used cartons. Peel-able fruits like oranges and bananas are just allowed to stay in a specific area in the garage for a while before bringing them in. Some bananas end up with those dreaded black spots all over with no one vying to consume them. These were used to make banana nut bread which is a favorite breakfast/snack around here.

With youtube vloggers picking up the slack during this global shutdown there is no dearth of good food vlogs. It is this vlog by Rani of salt & pepper that provided the inspiration and recipe for this bonda a.k.a undam pori. It seems very close to unniyappam which is better shaped I think.  So it was that the 2 over ripe bananas with no takers in the kitchen got transformed into these yummy snacks. I made some minor recipe changes based on what was available in the house.

In The Mix

over ripe bananas - 2 or 3
all purpose flour - 1 cup plus 1 or 2 tbsp

jaggery/sarkara or dark brown sugar - enough to make about 1 cup syrup
water - 1/4 cup
cardamom - 3
cumin - a pinch
ginger - 1/4" or less
salt - a pinch
grated coconut/coconut flakes or powder - 1-2 tbsp

option 1 rising agent
rapid rise yeast - 1 tsp
warm water - 2 or 3 tsp
sugar - 1/4 tsp

option 2 rising agent
baking soda - 1 tsp

oil -  1/2 cup or as needed

How To Do

Crush jaggery to 1/2" sized pieces for easy dissolving, add to 1/4 cup water and set on medium heat to make a syrup.

Crush cardamom, cumin and ginger and add in and stir all together. Once liquified, reduce a bit, drain and set aside to cool.

Add yeast and sugar to warm water and mix well together if using this option. No need for it to rise. 

Peel the bananas and mash all together and add the syrup. Now add in all purpose flour and mix together for a bit thicker than banana nut bread like consistency. Add in the yeast mix or baking soda. Add or reduce flour as needed.  Add a pinch of salt and coconut flakes and gently fold all together. The best feature of this recipe is that it can be made right away.

Heat oil in a pan on medium high heat. Take some batter in a spoon shape/fold it in with another spoon and gently drop into the oil once it is hot. There should be enough oil to cover more than half of the batter ball. Turn over once when sides brown and set aside to drain on paper towels. Yum😋


Sunday, February 23, 2020

Lamb Biriyani with Raita: Instapot


My Instapot is a 3qt size so as to co-exist peacefully with the rest of the kitchen gadgets that reside on the countertop to make our everyday lives a bit easier. This has not stopped it from being the modern akshayapatra of our household. There is nothing it cannot do on its own! This week it was time for some lamb biriyani. I started off thinking I can use the same recipe used in the chicken biriyani version of last week. How naive was I! Lamb is a whole different animal both literally and figuratively. It has a different cooking time so to match that with the cooking time for rice, a marinate step is essential. Reading a few recipe blogs helped me to decide on a course of action most comfortable for me.

This time the steps were from spicecravings where I also picked up an easy way to sauté/caramelize the onions for this recipe. Essentially I followed what I did for the chicken biriyani for flavors etc and followed most of the steps from spicecravings for the actual cooking. Results were outstanding! I don't know if I'll want to eat out for biriyani anymore when I have my own personal biriyani pot😊

In the Mix


lamb - 1.25 to 1.5 lbs cut into medium sized pieces. 
(beef can also be substituted for lamb)

basmati rice - 2.5 cups
water - 2.25 cups
mint leaves - 1/2 cup chopped
cilantro leaves - 1/2 cup chopped

ghee - 1.5tbsp
olive oil - 4-5 tbsp

for garnish and cooking
cashew nuts - optional
raisins - 1/4 cup
1/2 big onion
shallots - 6

addon -1
cloves - 6
cardamoms - 5
black pepper corns - 1.5 tsp
garlic - 8 pods

ginger - 1.25" thin piece


addon -2
kalajeera - 1.5 tsp (or shahjeera)
cinnamon stick - 3/4 crushed
bay leaf -1
bombay biryani masala - 2 tbsp
salt to taste


addon-3
green chillies - 5 sliced

addon-4
garam masala - 1.5 tsp
turmeric - 1/2 tsp
paprika/kashmiri chili -3-4 tsp


How To Do

Cut the lamb to medium sized pieces, wash and set aside. I had about 50:50 ratio of bone-in to boneless pieces. 

In a pestle, crush all items from addon-1 in that order. Cloves, cardamom, pepper, ginger, garlic. Transfer to a bowl, add the meat pieces along with all items from addon-2. Kalajeera, cinnamon stick, bayleaf, biriyani masala and mix well together. Add salt to taste and marinate overnight in fridge or at least 1-2 hours for better results.  Before cooking, take the meat out and  keep at room temp for at least 30 minutes.

Soak the rice for 20-30 minutes, drain and set aside.

Turn on oven to 425 degrees and wait for it to reach temperature. Mix the onions and shallots with salt, 1 tbsp olive oil and 1/2 tbsp ghee and spread on a cookie sheet with aluminum foil. Bake in oven for 10-15 minutes stirring in between making sure the onions don't get burnt. Reserve half of the onions for cooking and keep the rest to be used later for garnish.

Turn on the sauté function of the instapot, add 1 tbsp of ghee and 2 tbsp of olive oil. Fry the raisins until they swell up, then the cashew nuts if using and keep with the onions set aside for garnishing.

Add 1-2 tbsp more of olive oil to the instapot pan and sauté the green chili from addon-3. sauté for 1-2 minutes, then mix in the reserved onions, add salt as needed and sauté for another 1-2 minutes. Check and make sure that the sauté function is still on while this is going on.


Now add the meat mix and sauté well on both sides for 4-5 minutes. Always check the bottom of the pan and scrape with a wooden spoon to make sure that there is no sticking to the bottom while sautéing. Now add items from addon-4 garam masala, paprika, turmeric and mix well together for 2-3 minutes. Check salt.

Spread rice on top, add water and check salt for taste. Do not mix but make sure the meat stays below the water level. Sprinkle mint and cilantro leaves on top. Close the lid and pressure cook on high for 7 minutes. Pressure release at normal for 10 minutes and release any remaining pressure manually. 

Now mix lamb and rice together into a serving dish, garnish with raisins and onions and enjoy endlessly with papads and raita.

All I can say is that the magic pot is here to stay.

Raita
I realized that I have not posted how to make raita anywhere. 

Need the following:
   big red inion - 1 sliced this
   carrot - 1 small diced to small pieces
   tomato - 1 medium diced to small pieces
   1-2 green chillies - sliced to thin disks
   cilantro - 1 tbsp chopped
   salt to taste
   vinegar to taste
   yogurt - enough to mix up the above

Take the onion in a bowl, generously pour vinegar and salt and mix/squeeze all well together. Wash/drain with cold water. Now check salt and vinegar and add both just enough to taste. To this add carrot, tomato, cilantro and green chilies and mix well together. Add in enough yogurt to cover all, check salt again  and enjoy with biriyani of any kind. 

Tuesday, February 18, 2020

Chicken Biriyani Instapot Edition

Like the air-fryer, instapot is another invention of the decade that has impacted how my kitchen activities evolved. Biriyani while highly palatable, had always evoked the image of a labor intensive dish in my food prep plans and so it never made it into a regular menu item. That is, until Mr. Instapot took a foothold on the crowded kitchen counter.

It was an uninspiring Monday of a lazy  3-day weekend and I was walking around musing on dinner ideas for the coming week. Too lazy to go to the grocery store and equally lazy to wash dishes. That is when the idea that has struck many a harried mother the world over occurred to me too. Make something with whatever is in the kitchen. Being an engineer by profession, I'd say laying out and executing a project plan is way easier than coming up with a dish plan on a whim. Not a natural cook by any means, I found that food videos and blogs inspire the latent cook in me. So watching and reading is what I did.

I had chicken legs at home and rice and the instapot too. I liked Vahchef's idea of a flavorful chicken biriyani in a cooker and myheartbeet's instapot steps were well laid out and precise. Decided to combine both with a bit of overlap in flavors and steps and voi-la born the biriyani that hitherto will be a constant go to product, er dish in my humble kitchen.

In the Mix


chicken legs - 6 

basmati rice - 2 cups
water - 2 cups
mint leaves - 1/2 cup chopped
cilantro leaves - 1/2 cup chopped

ghee - 1tbsp
olive oil - 3 tbsp

for garnish
cashewnuts - optional
raisins
2 shallots

addon -1
cloves - 4
cardamoms - 3
black pepper corns - 1 tsp
garlic - 5 pods

ginger - 3/4" thin piece


addon -2
kalajeera - 1 tsp (or shahjeera)
cinnamon stick - 1/2 crushed
bay leaf -2
biryani masala - 1 heaped tbsp
salt to taste


addon-3
green chillies - 5 sliced
shallots - 6 sliced thin

addon-4
garam masala - 1 heaped tsp
turmeric - 1/4 tsp
paprika/kashmiri chili -2 to 3 tsp


How To Do

Soak the rice for 20-30 minutes, drain and set aside.
Halve each of the chicken legs, wash and set aside.

In a pestle, crush all items from addon-1 in that order. Cloves, cardamom, pepper, ginger, garlic.
Transfer to a bowl, add the meat pieces along with all items from addon-2.
Kalajeera, cinnamon stick, bayleaf, biriyani masala and mix well. Add salt to taste and set aside for 30 minutes.

Turn on the saute function of the instapot, add 1 tbsp of ghee and 2 tbsp of olive oil. Fry the raisins until they swell up, then the cashew nuts and set aside. Saute 2 sliced shallots for 4-5 minutes and set aside all for garnishing later.

Add the remaining 1 tbsp of olive oil to the instapot pan and add the shallots and green chili from addon-3. Add salt as needed and saute for 6-7 minutes. Check and make sure to select the saute default timer does not get turned off.

Now add the meat mix and saute well on both sides. 6-7 minutes. 
Add items from addon-4 garam, masala, paprika, turmeric and mix well together for 2-3 minutes. Make sure to scrape the bottom of the pot so the BURNT won't show up later on. Deglaze with bit of water if needed. Check salt.

Spread rice on top. Add water. Do not mix together. Sprinkle mint and cilantro leaves on top. Close the lid and pressure cook on high for 7 minutes. Pressure release at normal for 10-12 minutes and release any remaining pressure manually. 

Garnish with raisins/cashews and onions, remove to a serving dish and enjoy unashamedly with papads and raita.

Unfortunately picture taking couldn't be done before the dish did its disappearing act. So that will have to wait until it gets made again which can't be that far off going by the glowing reviews.